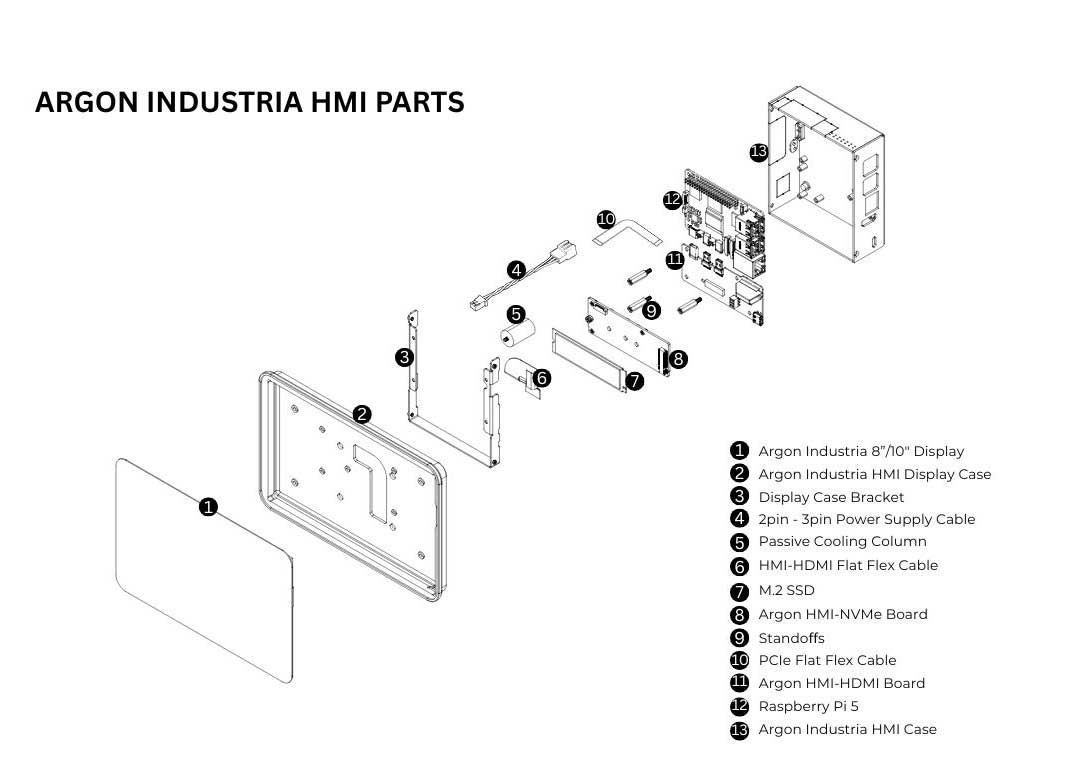
¶ Argon Industria HMI Assembly Guide
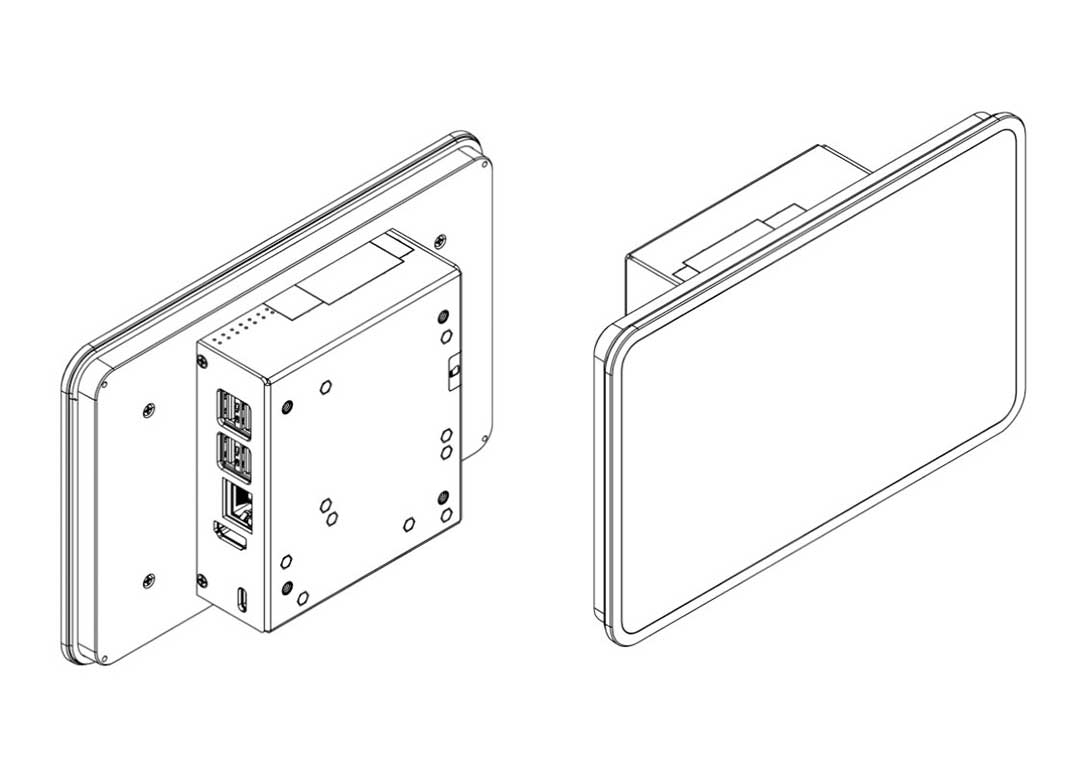
¶ 5" & 7" Parts and Features
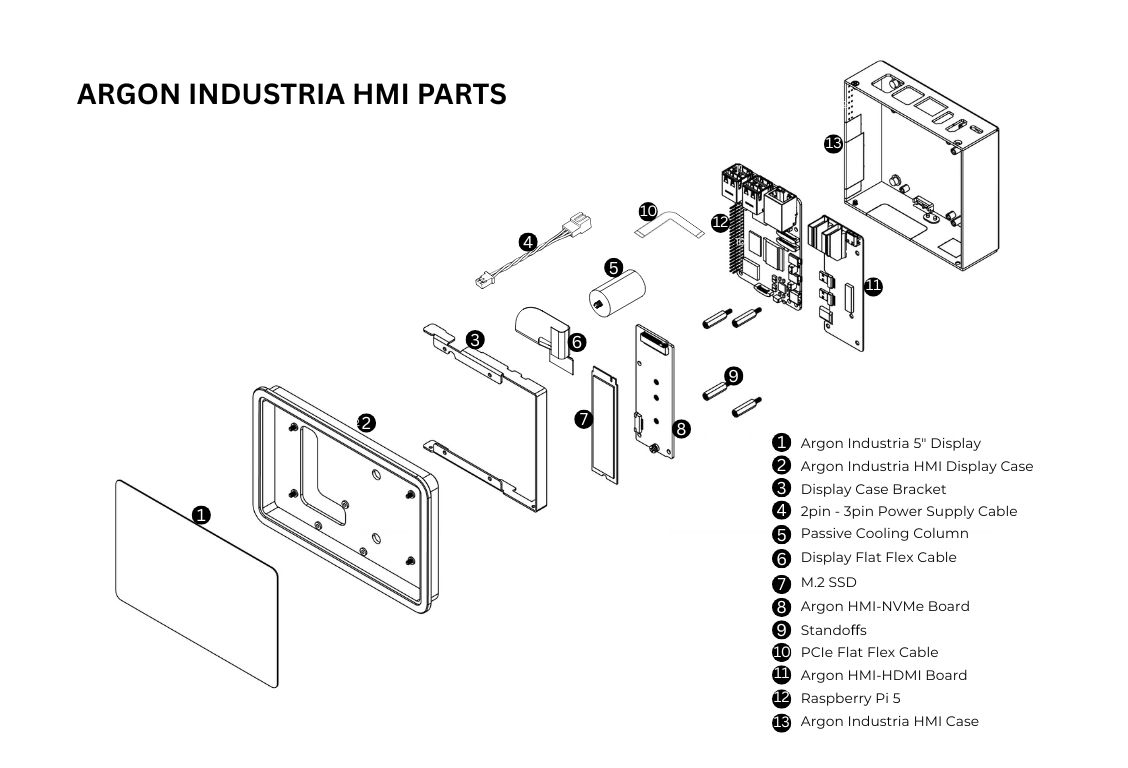
¶ Argon Industrial HMI 5" 7"
¶ 5" & 7" Assembly & Setup
1. Apply the Silicon Thermal Pad on the Raspberry Pi 5. Make sure to REMOVE THE TRANSPARENT BACKING on both sides of the thermal pad.
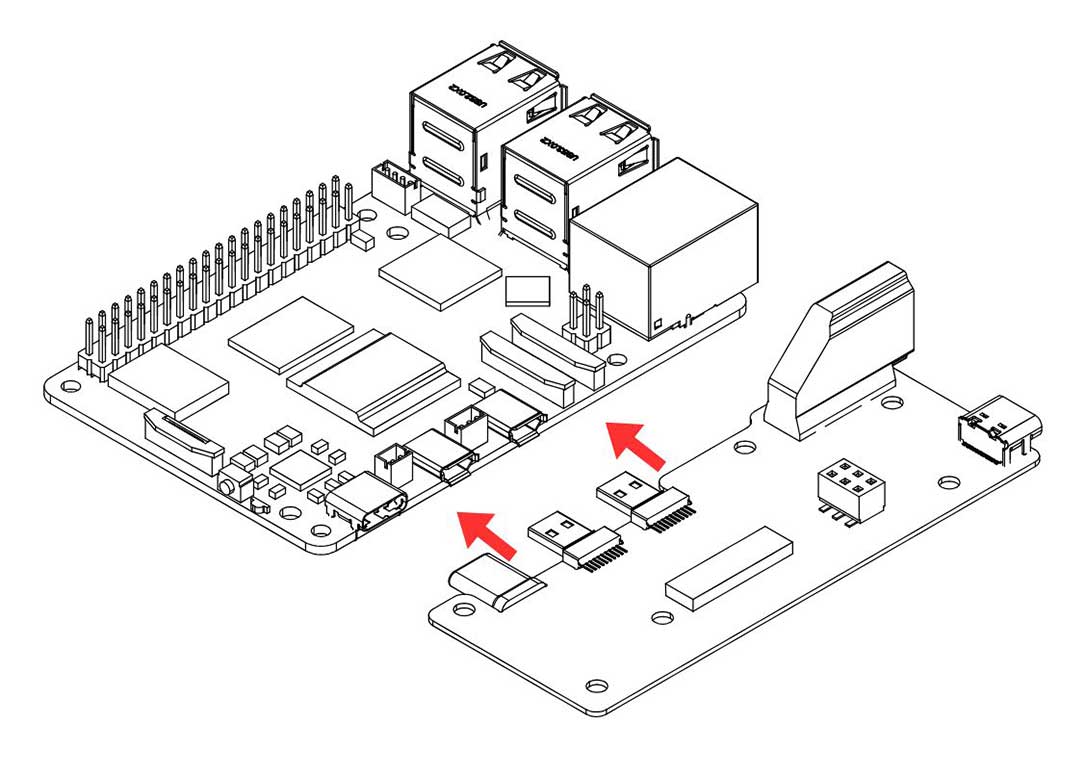
2. Connect the Raspberry Pi 5 to Argon HMI-HDMI Board. PUSH ALL THE WAY IN the Argon HDMI Daughterboard, Make sure that the HDMI-Power Daughterboard is FULLY CONNECTED to the RPi 5 to AVOID POWERING UP ISSUES.

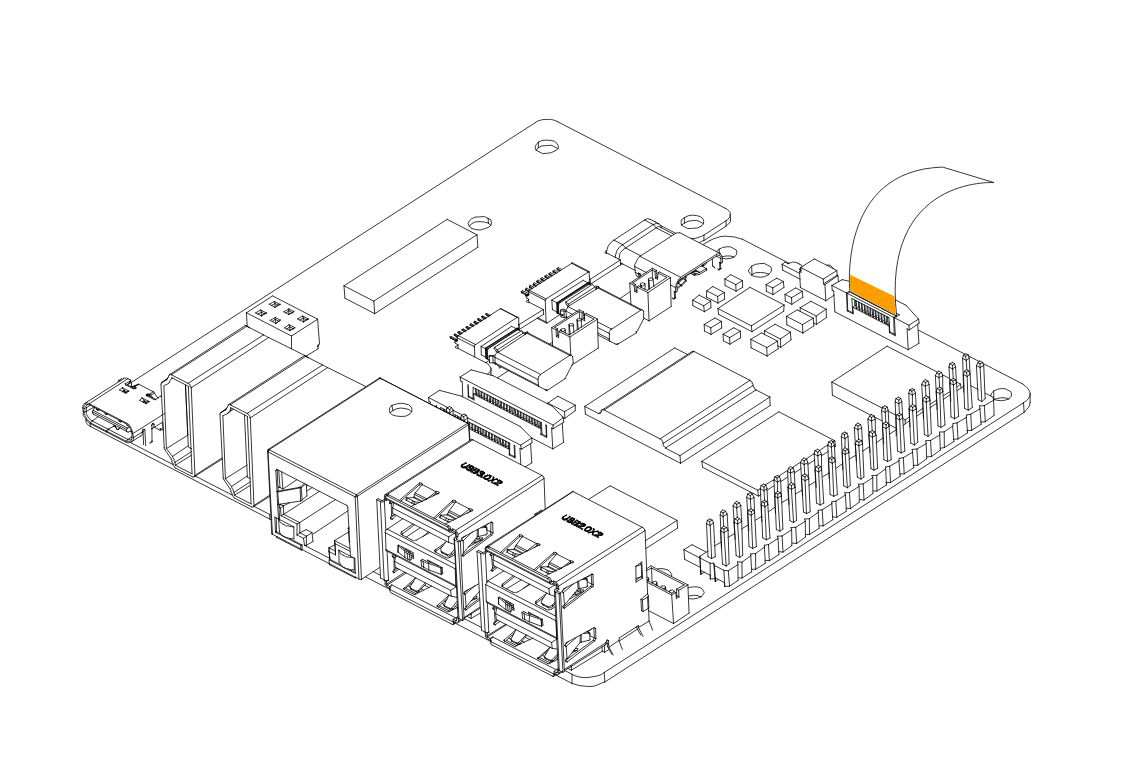
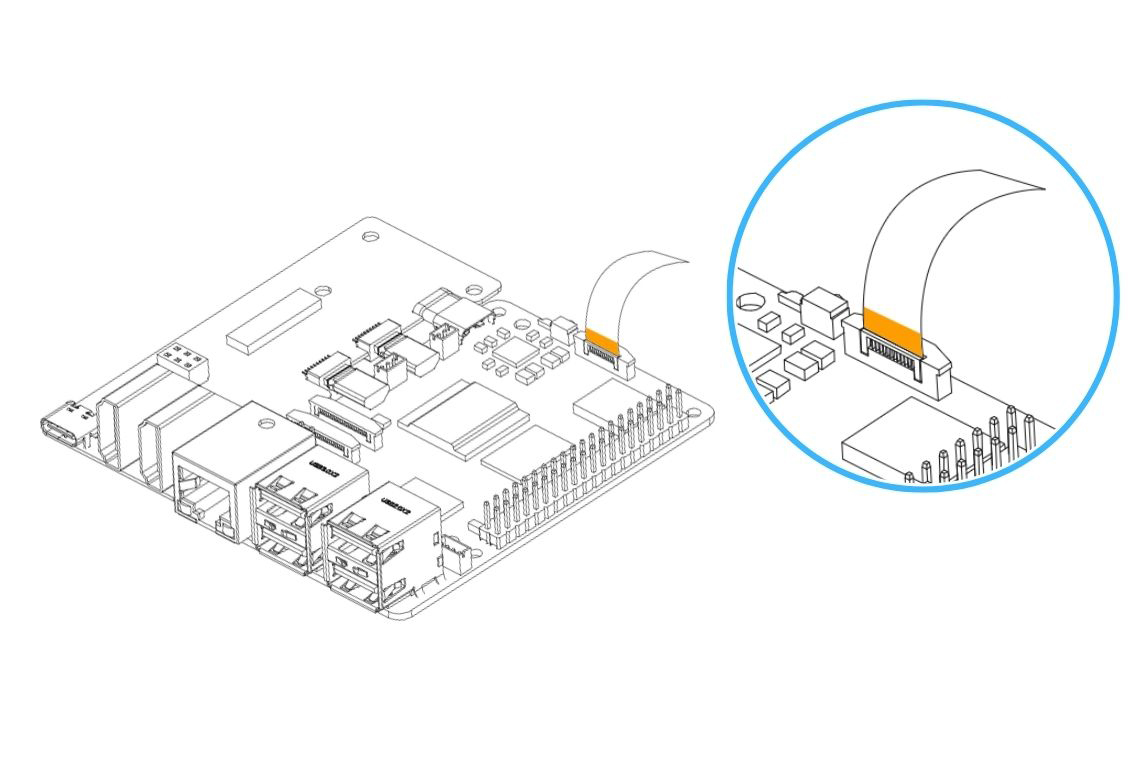
3. Carefully connect the PCIe Flat Flex Cable to the Raspberry Pi 5 PCIe Connector. Be careful when handling the brown PCIe flip/cover. Pull up the brown flip to release the lock. COPPER SIDE of the strip should be facing the white back side of the PCIe connector of the Raspberry Pi 5.
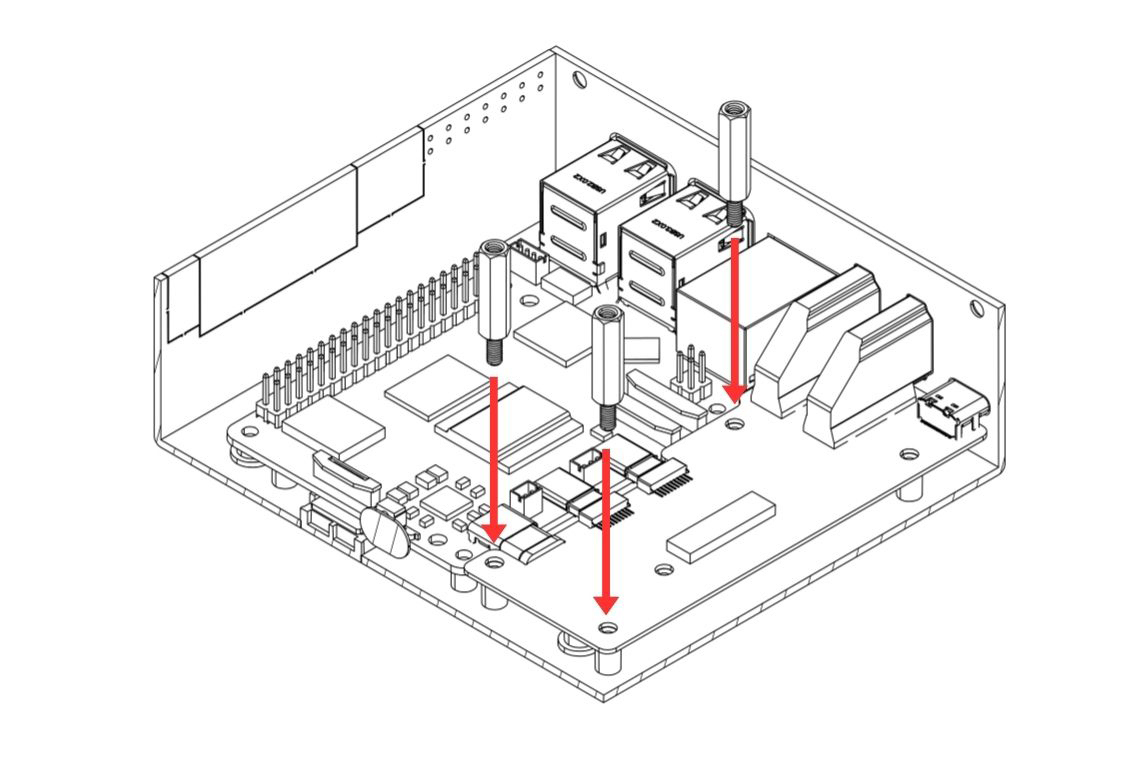
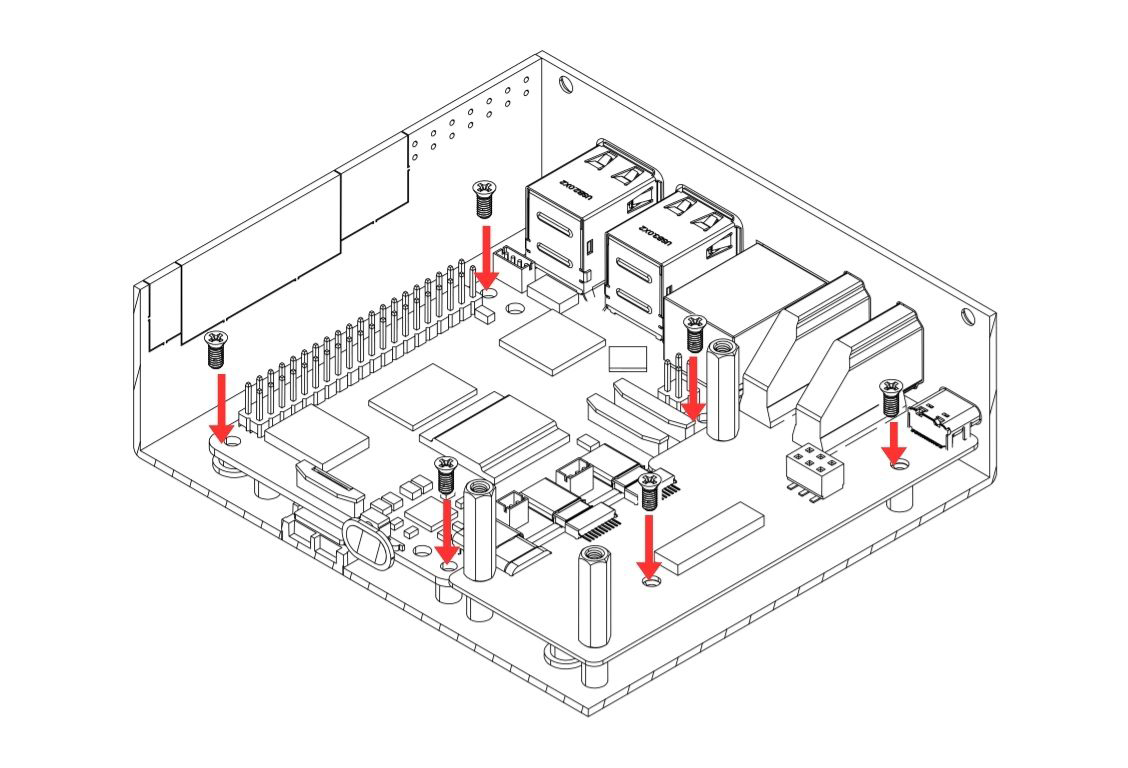
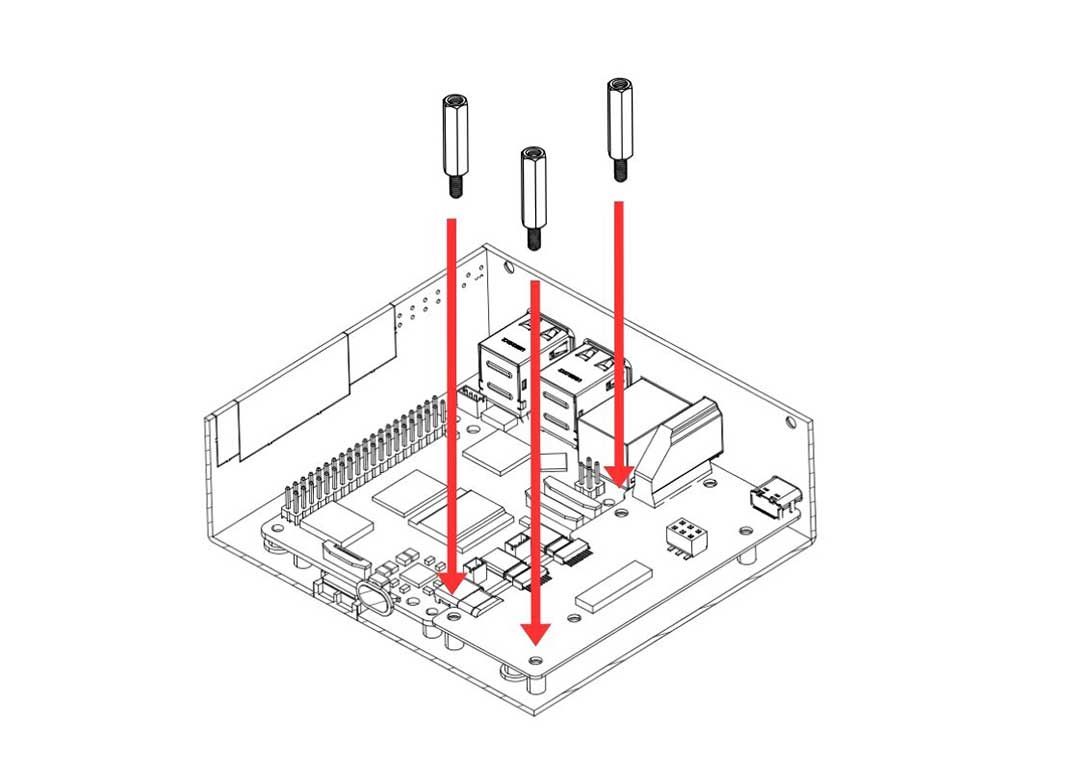
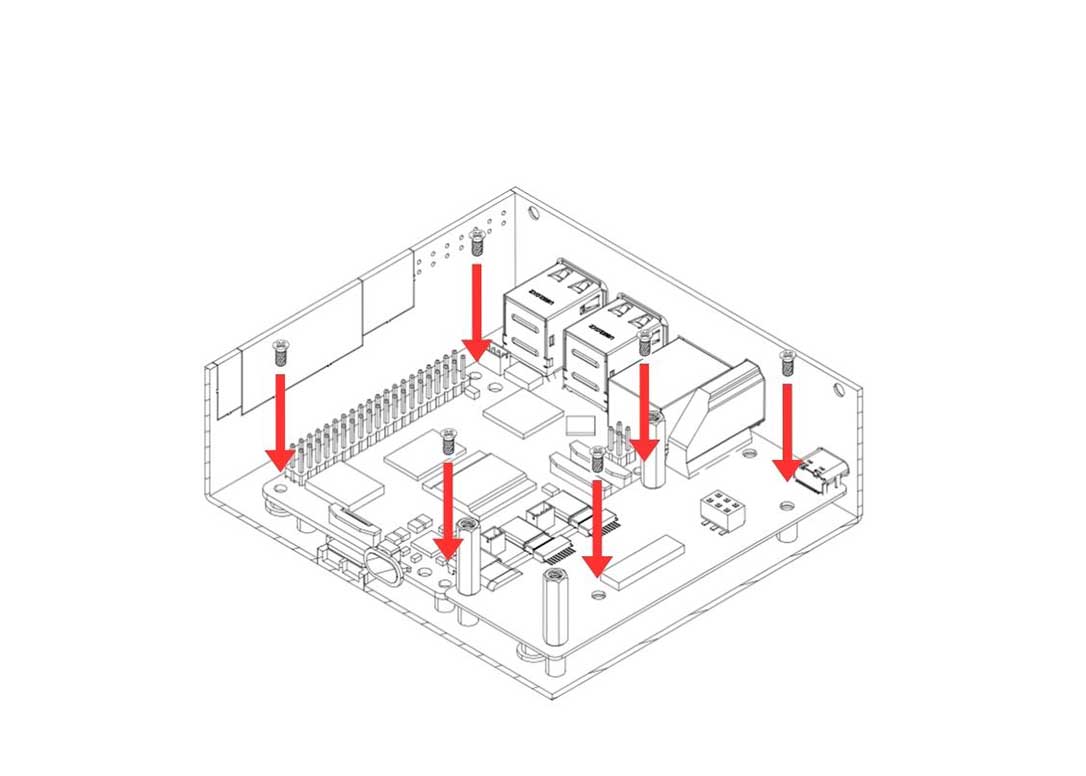
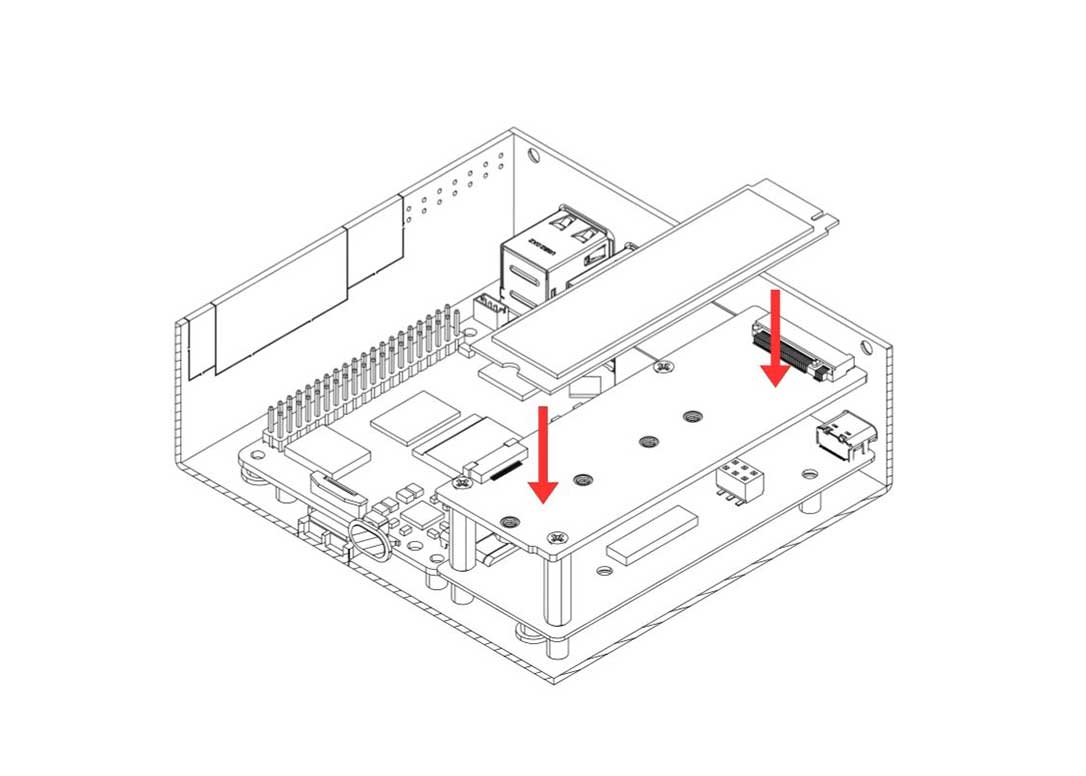
4. Carefully attach the Raspberry Pi 5 and the Argon HMI-HDMI Board into the Argon Industria HMI Case. Secure the boards using the flat head screws. Also secure the Argon HMI-HDMI Board using the Standoffs.
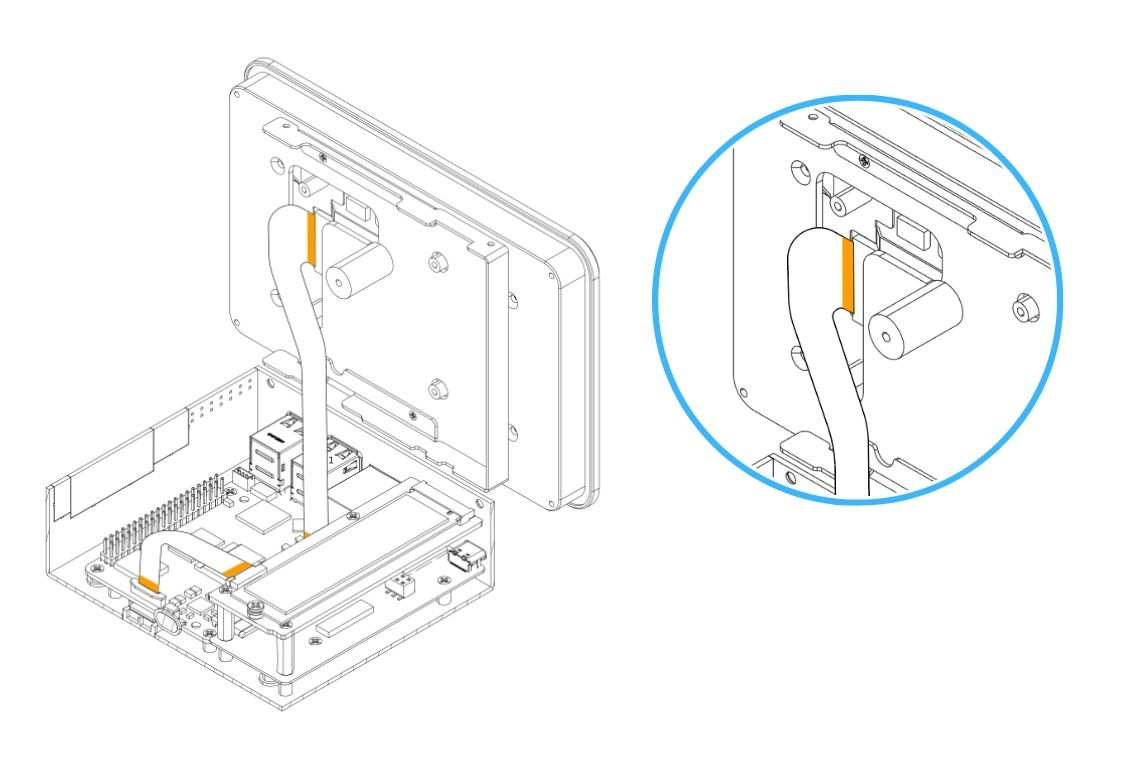
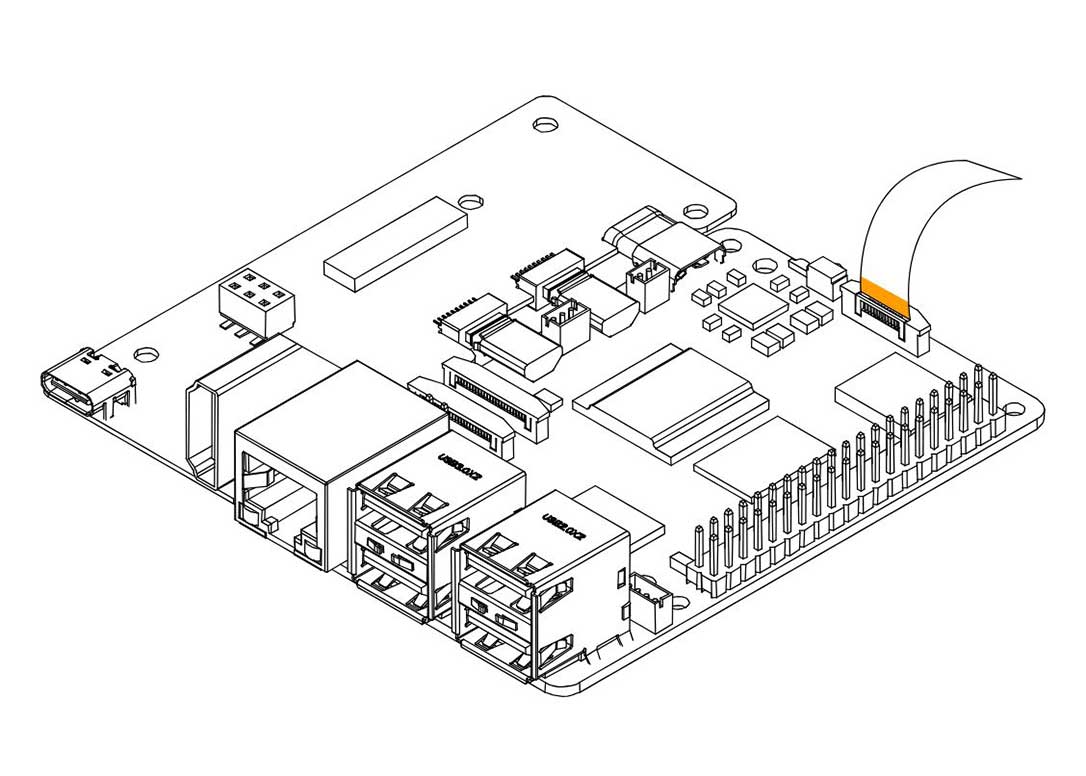
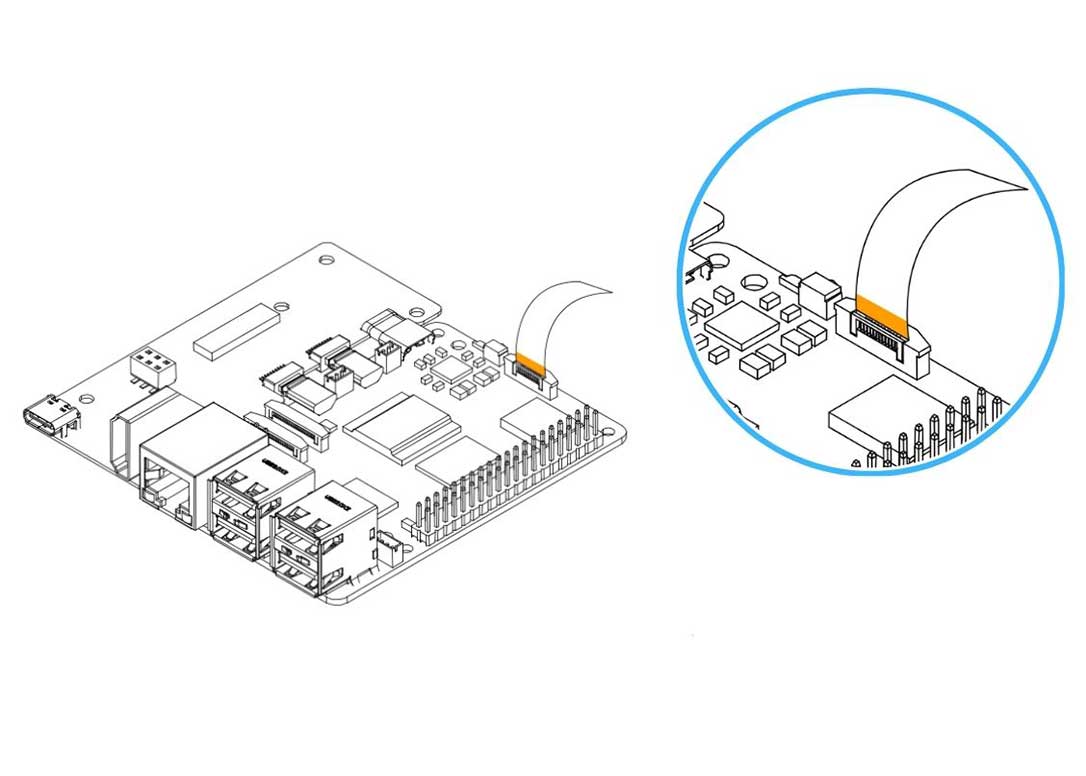
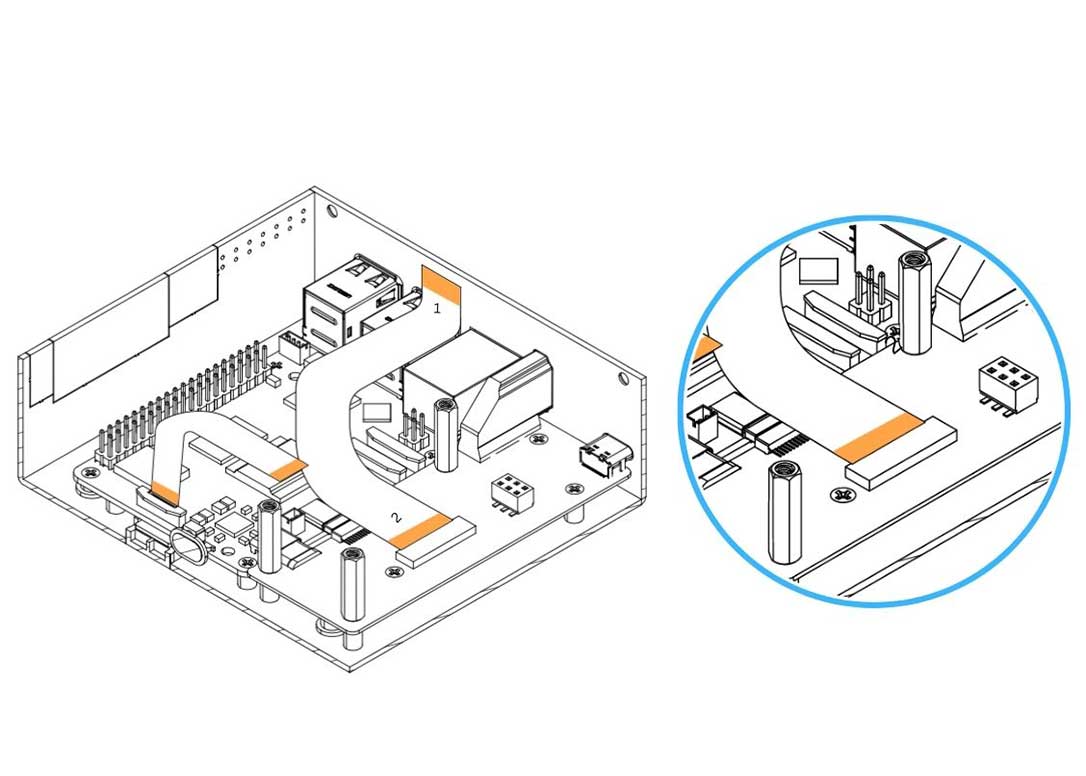
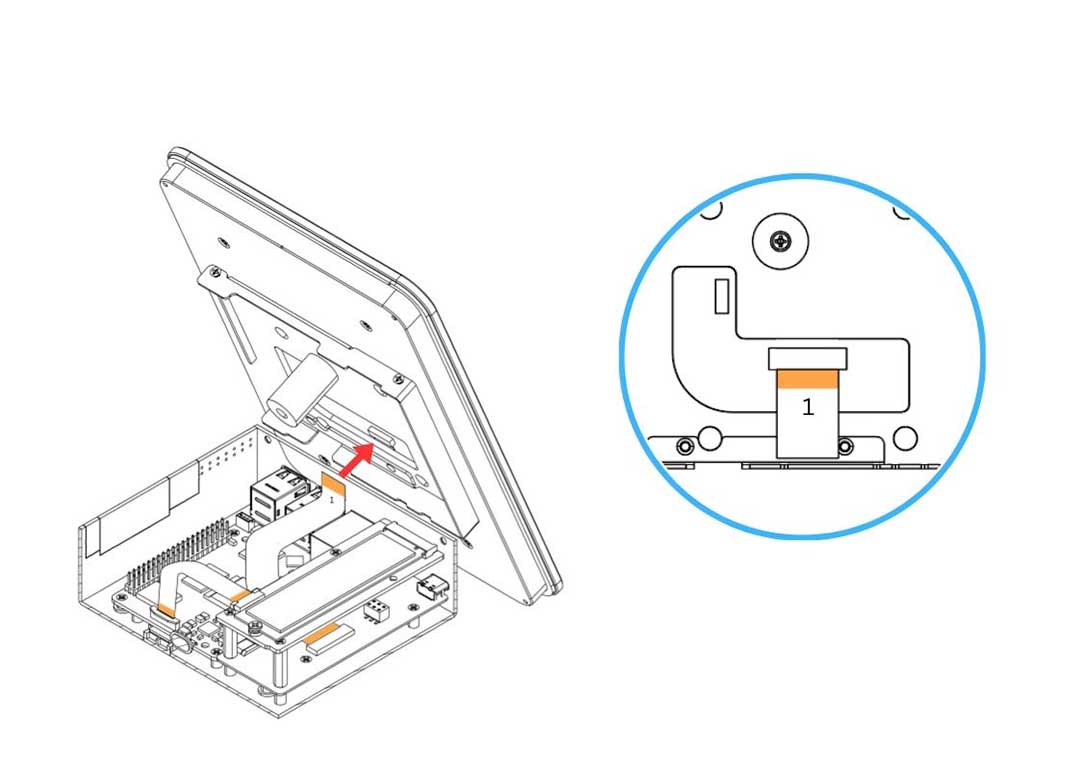
5. Carefully connect the HMI-Display Flat Flex Cable to the Raspberry Pi 5. Be careful when handling the flip/cover. Pull the flip to release the lock.

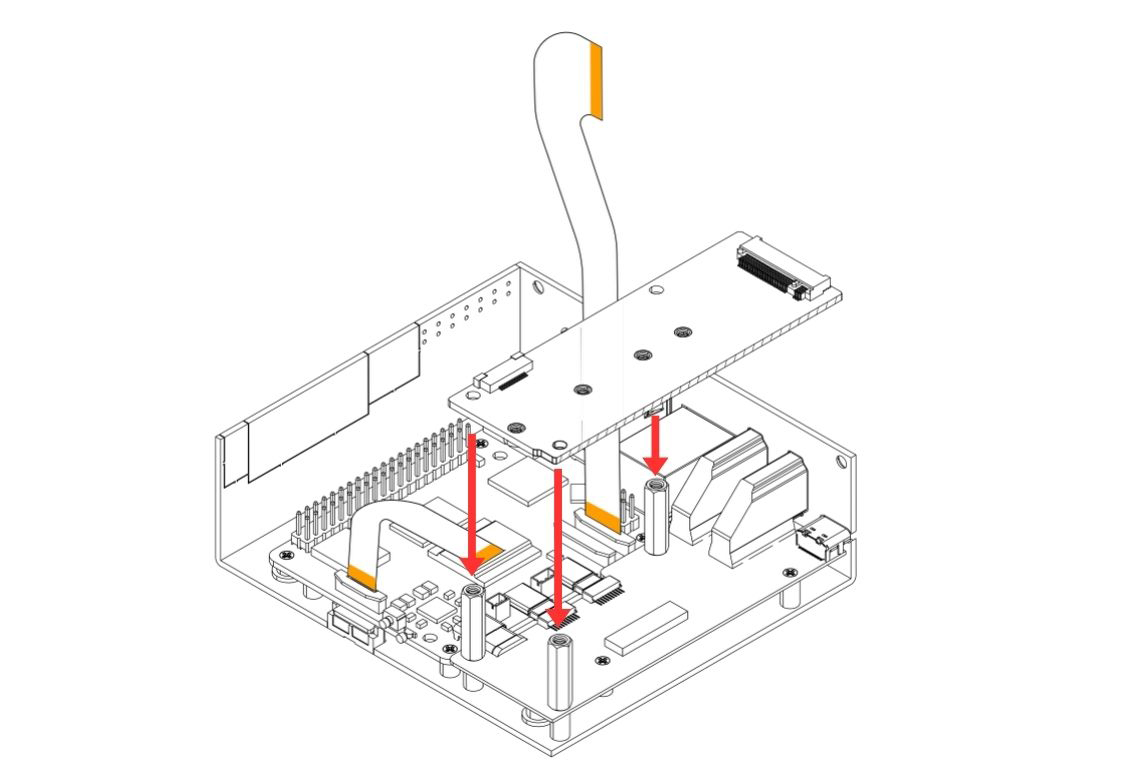
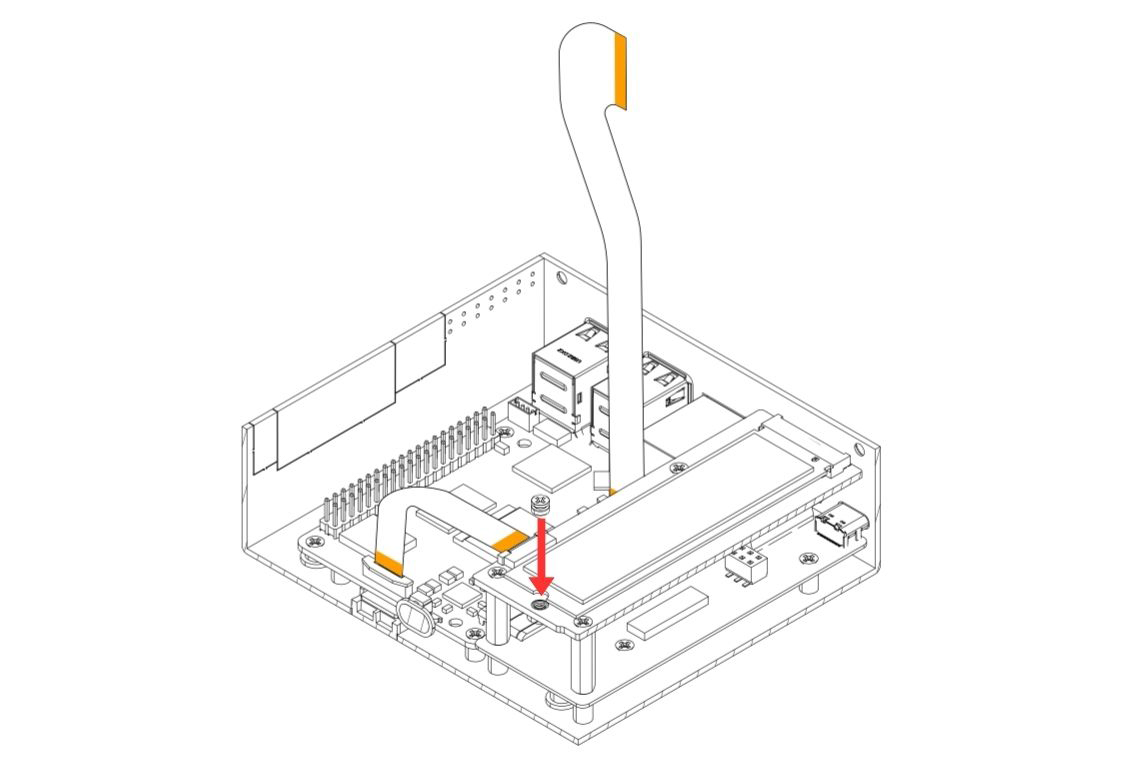
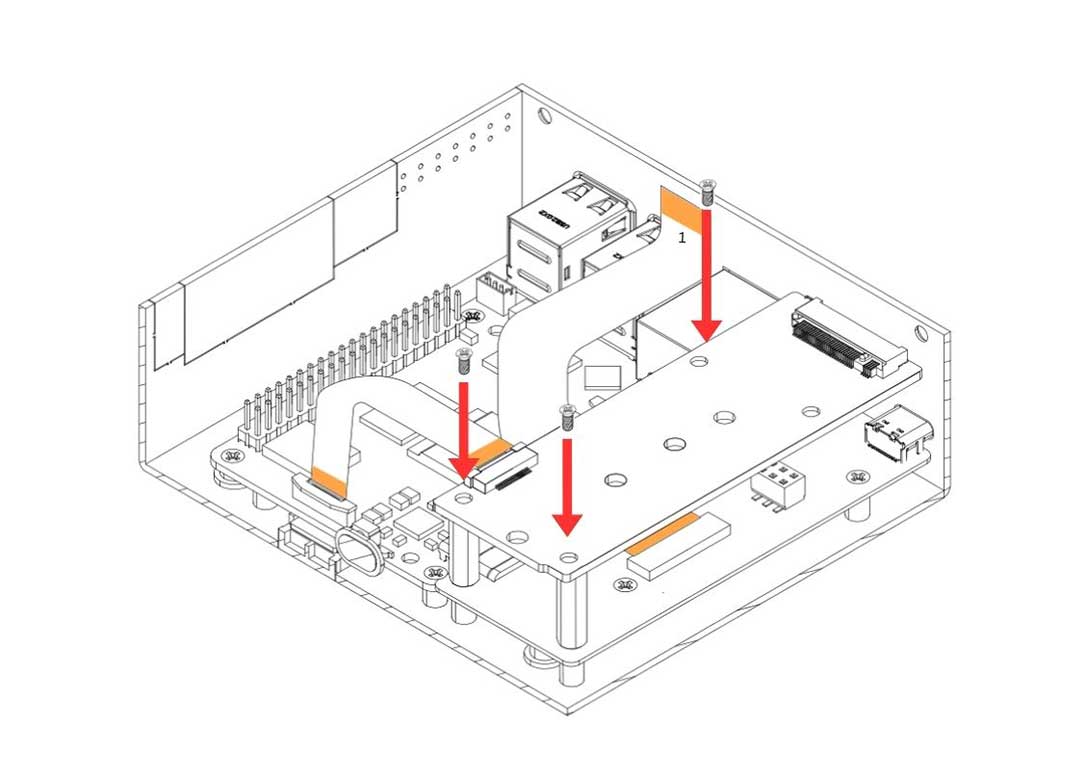
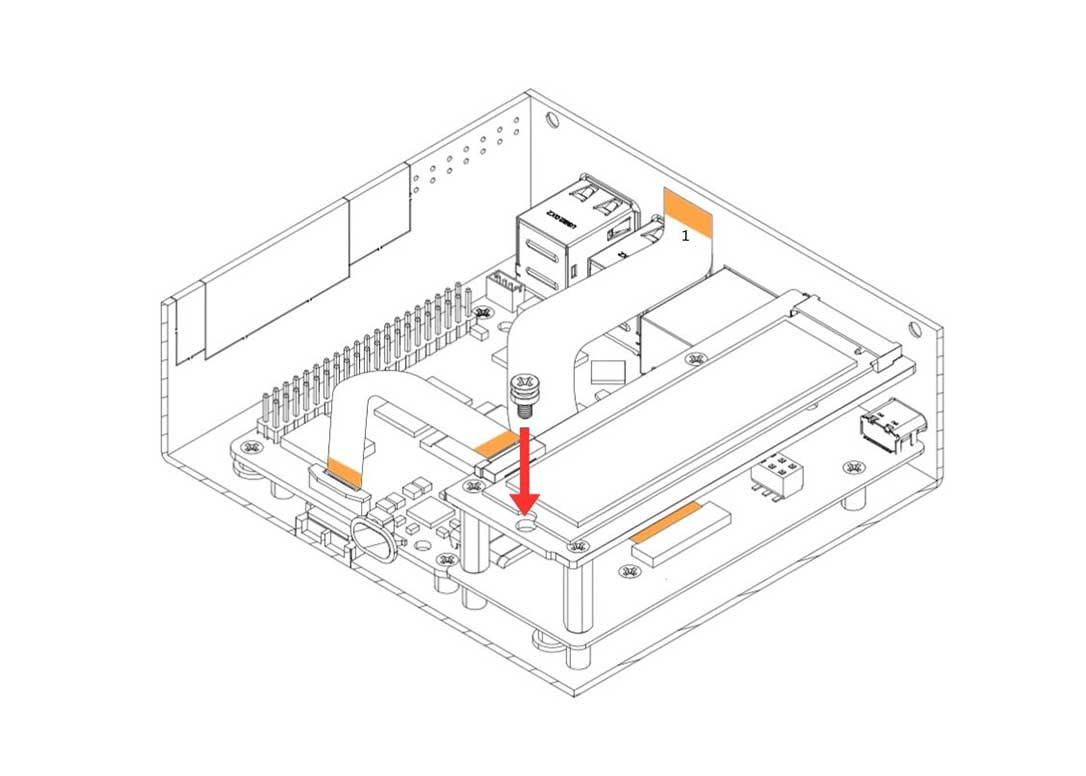
6. Carefully attach the Argon HMI NVMe Board on top of the Argon HMI-HDMI Board. Please align the NVMe Board to the Standoffs and secure using the Flat Head Screws.

7. Connect the M.2 SSD to the Argon HMI NVMe Board and secure it using the NVMe Scew.
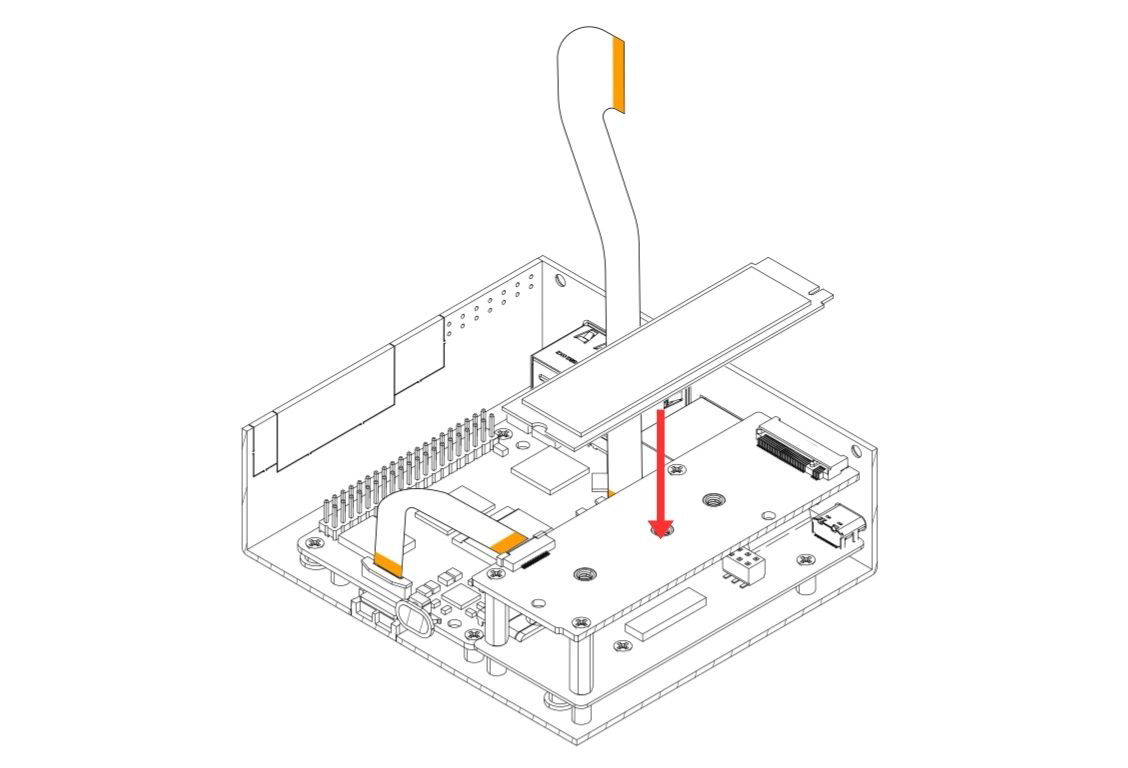
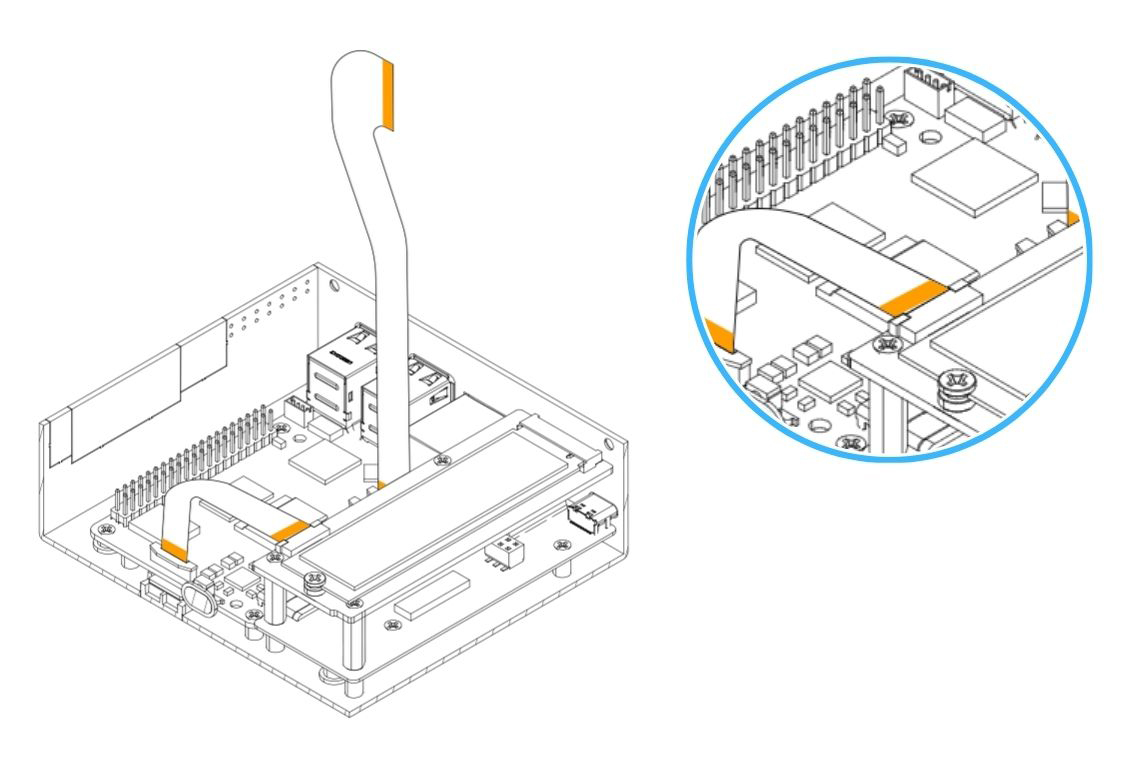
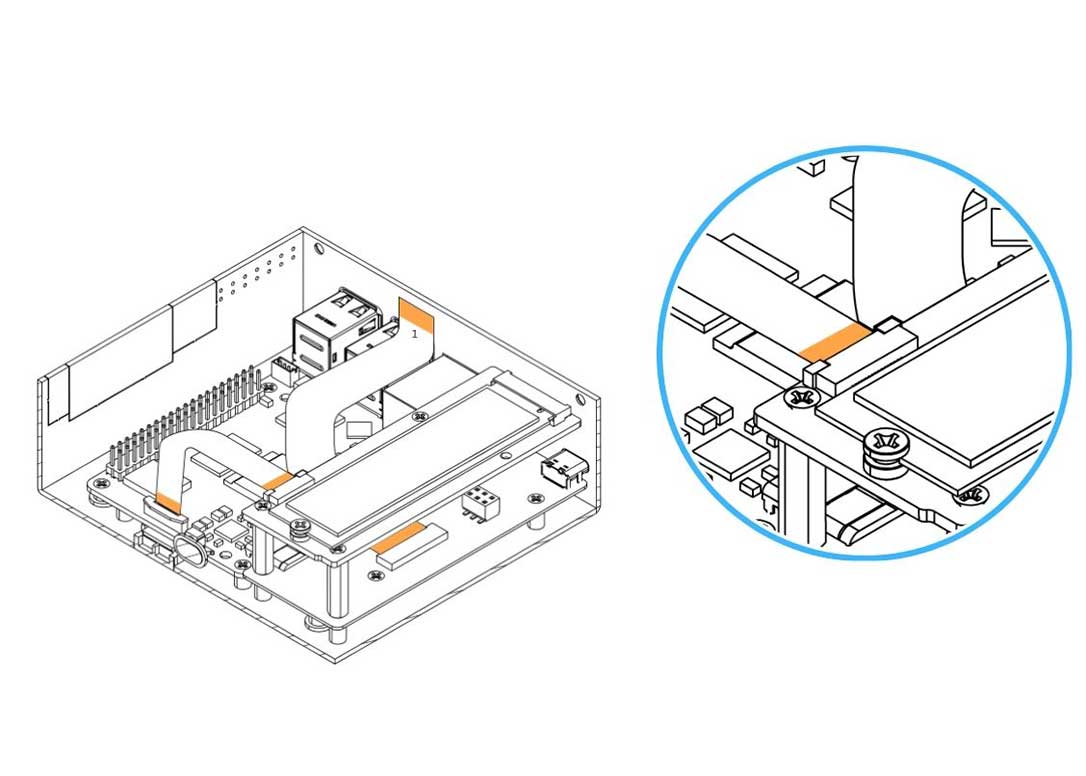
8. Carefully connect the PCIe Flat Flex Cable to the Argon NVMe Board. Be careful when handling the NVMe board connector flip/cover. Pull the flip to release the lock.
9. Attach the Passive Cooling Column and the Argon 5"/7" Touch Display to the Display Case and secure it using the Flat Head Screws.
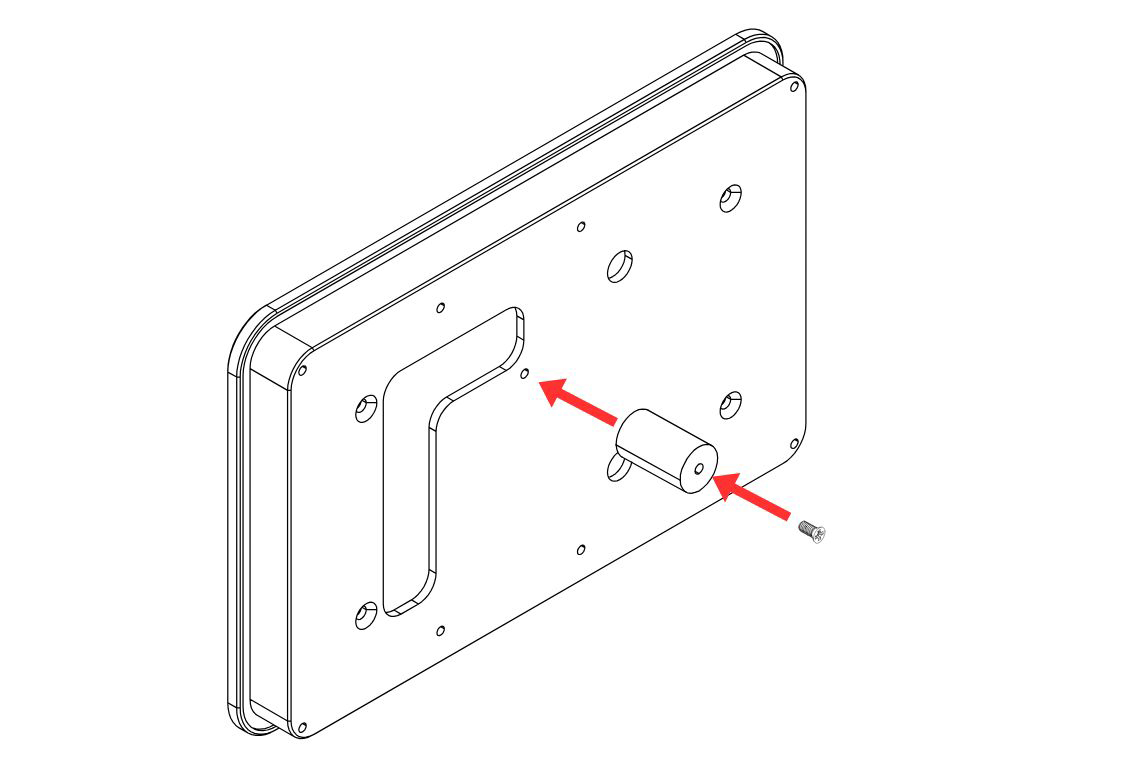
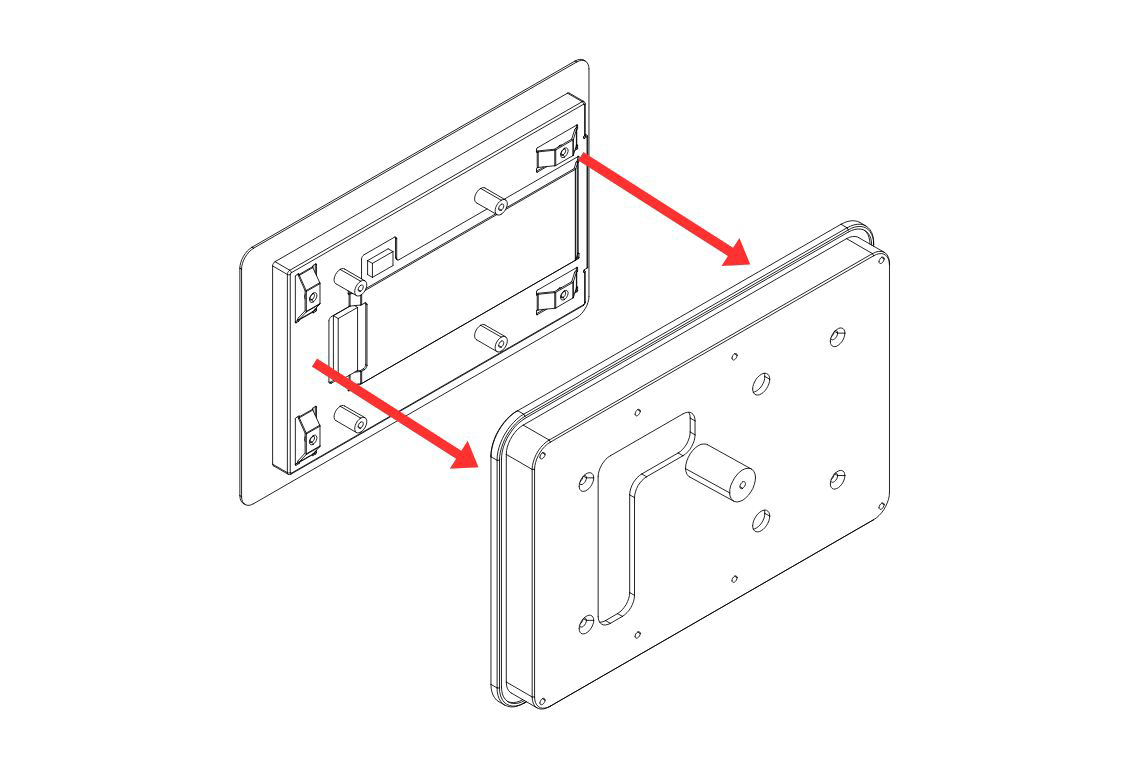
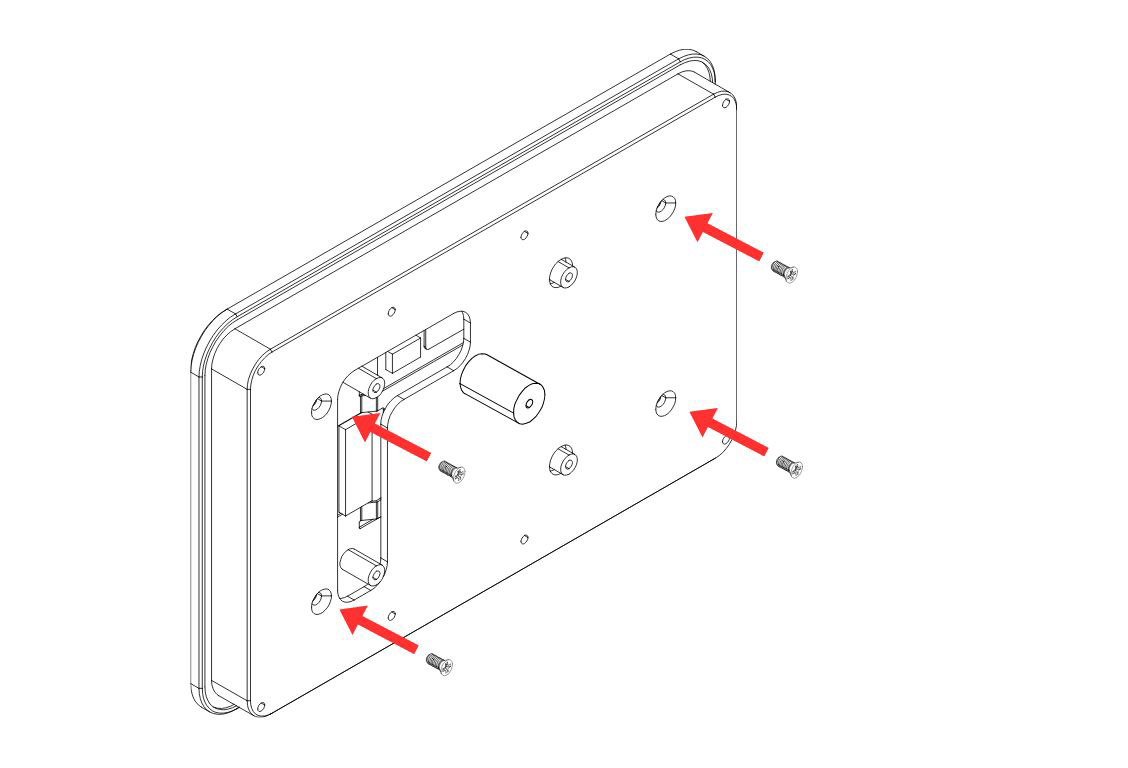
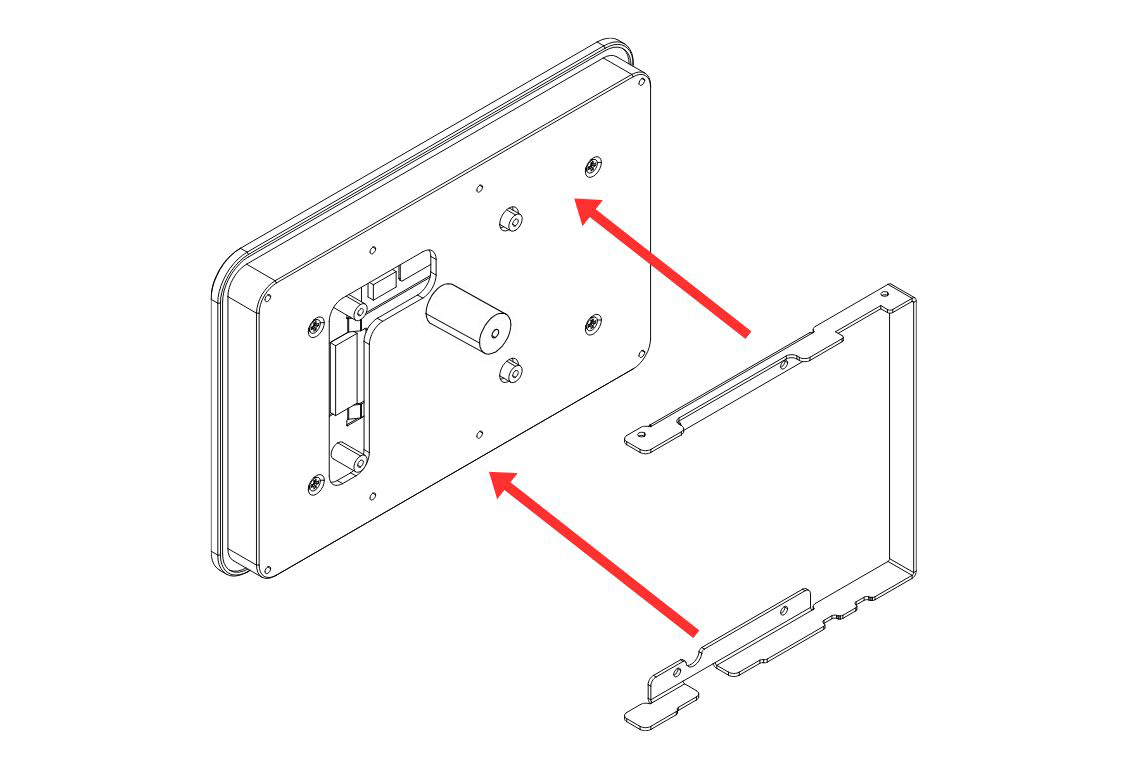
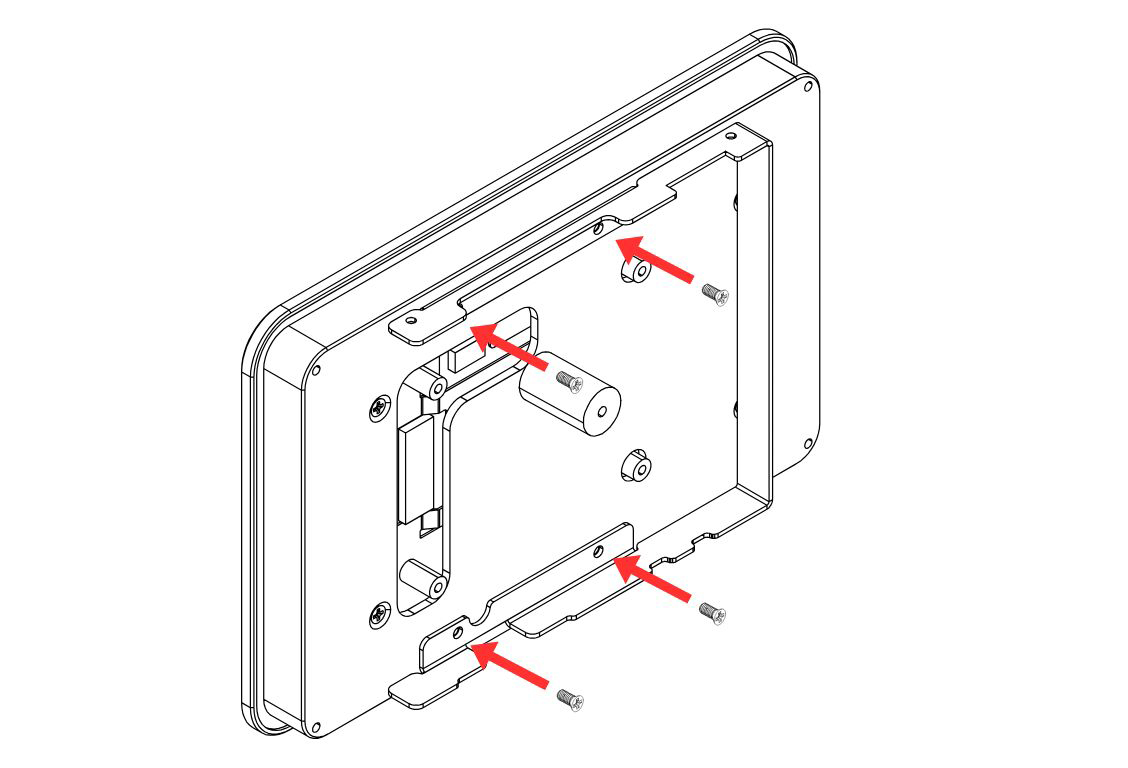
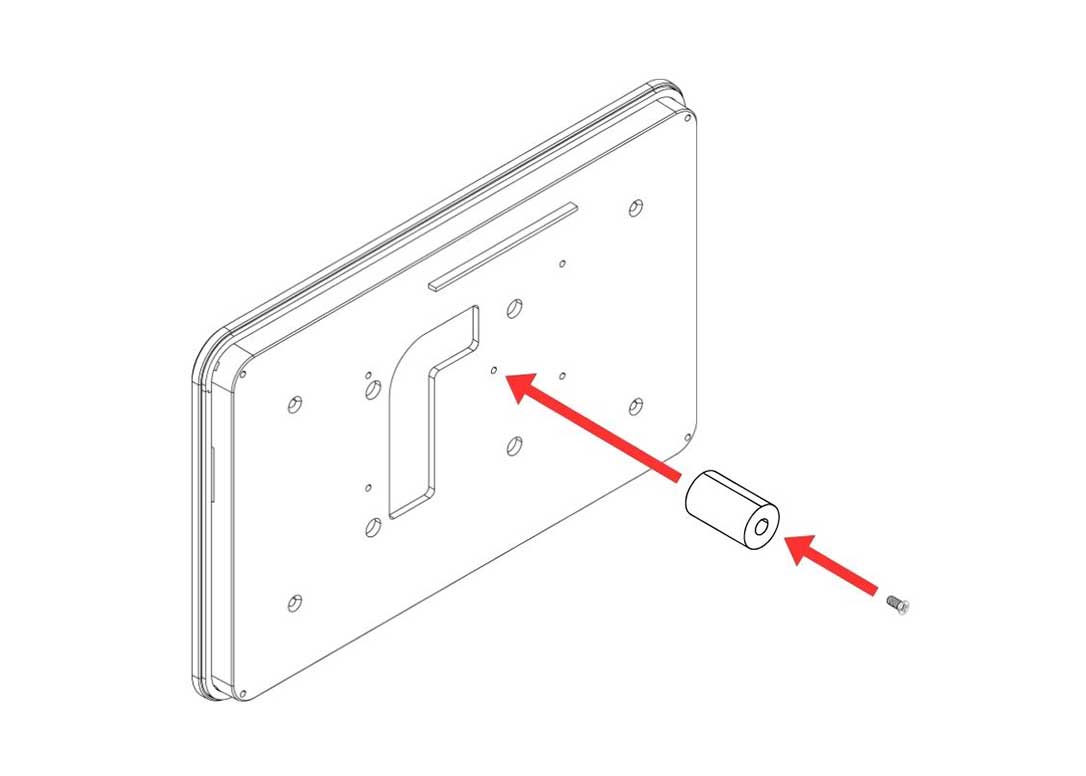
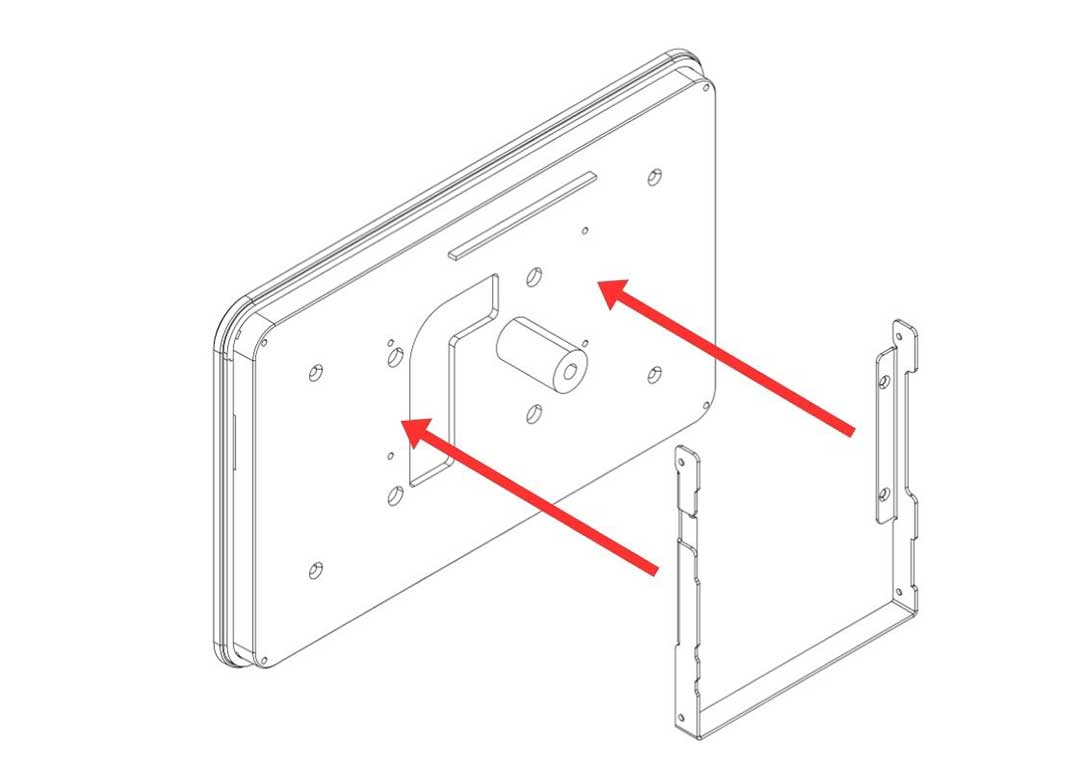
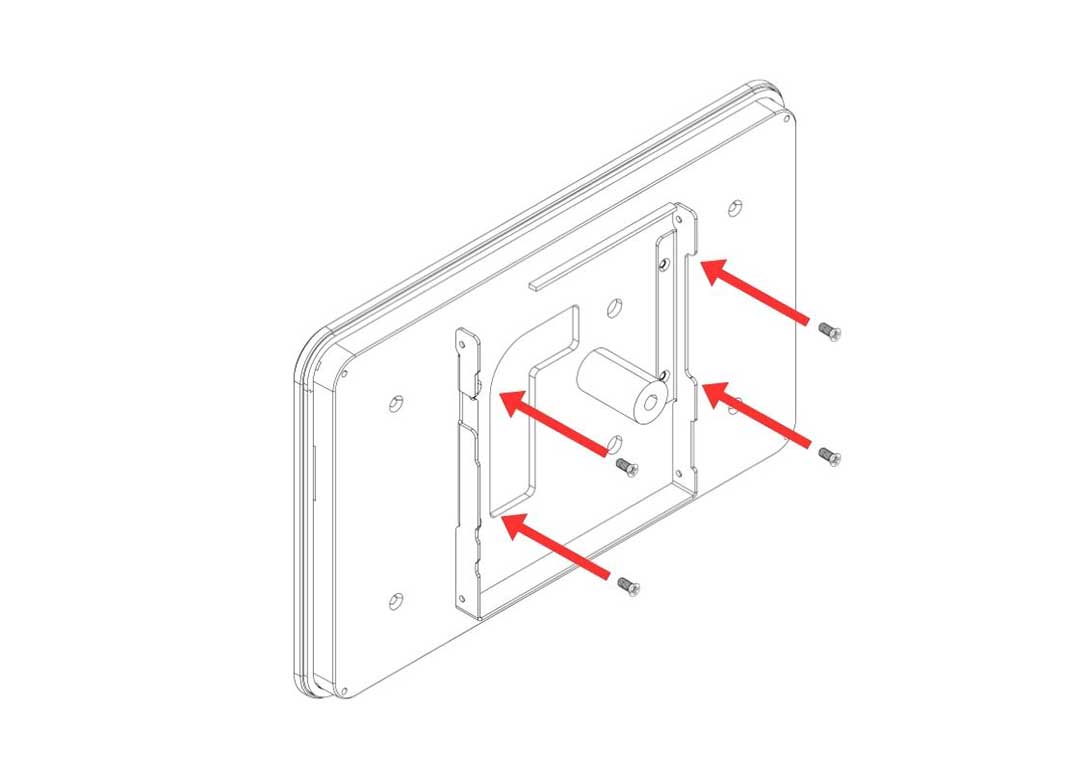
10. Attach the Bracket to the Display Case and secure it using the Flat Head Screws.
11. Carefully connect the HMI-Display Flat Flex Cable to the Touch Display. Be careful when handling the Display flip/cover. Pull the flip to release the lock.
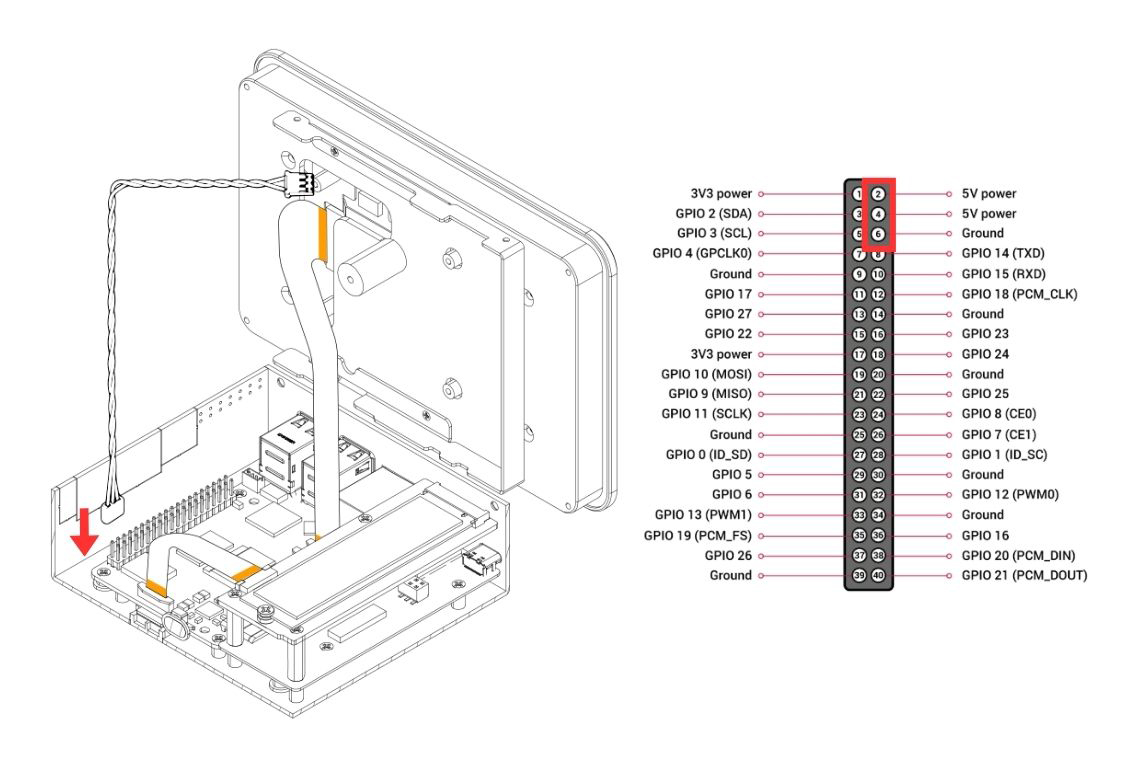
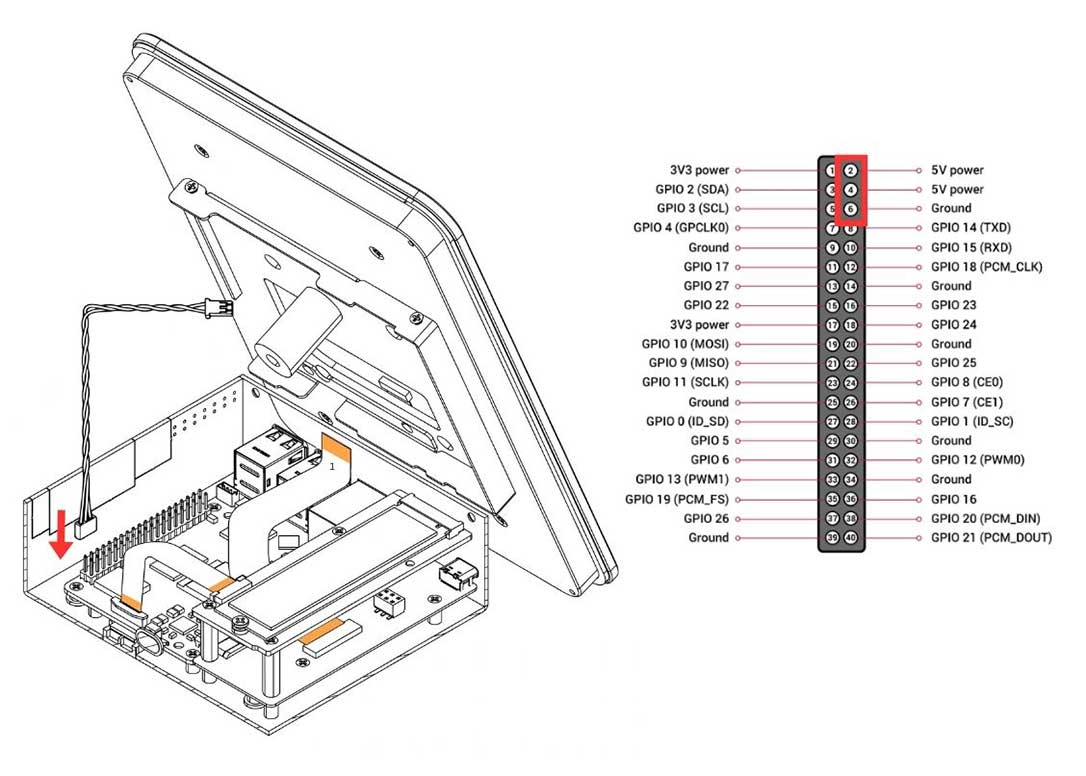
12. Carefully connect the 3 pin end of Power Supply Cable to the GPIO. Make sure it is connected to the 2x 5V power (2,4) and Ground (6).
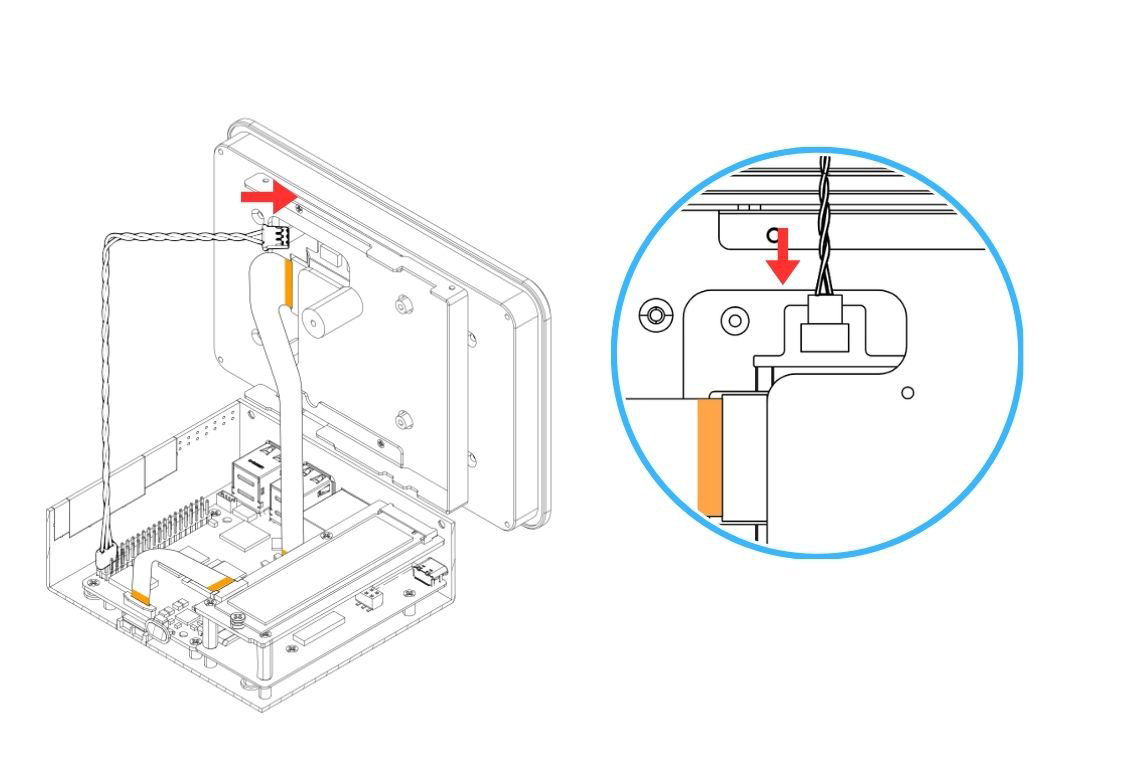
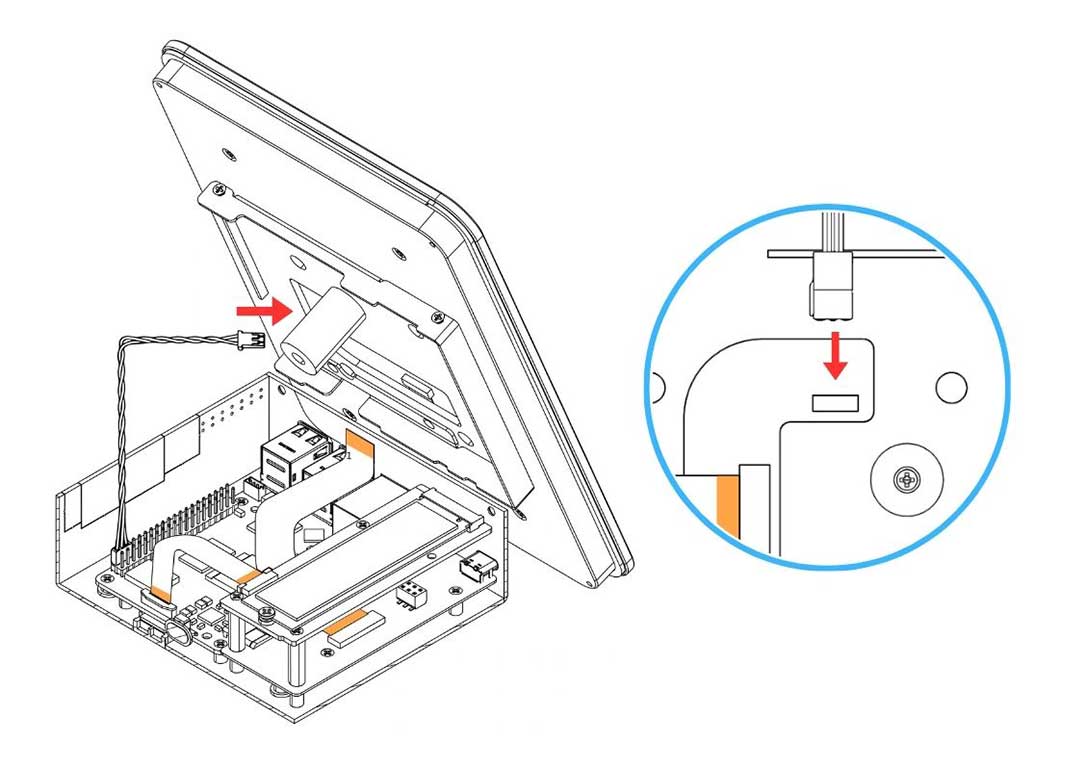
13. Carefully connect the 2 pin end of the Power Supply Cable to the Argon Touch Display. Make sure it is connected properly.
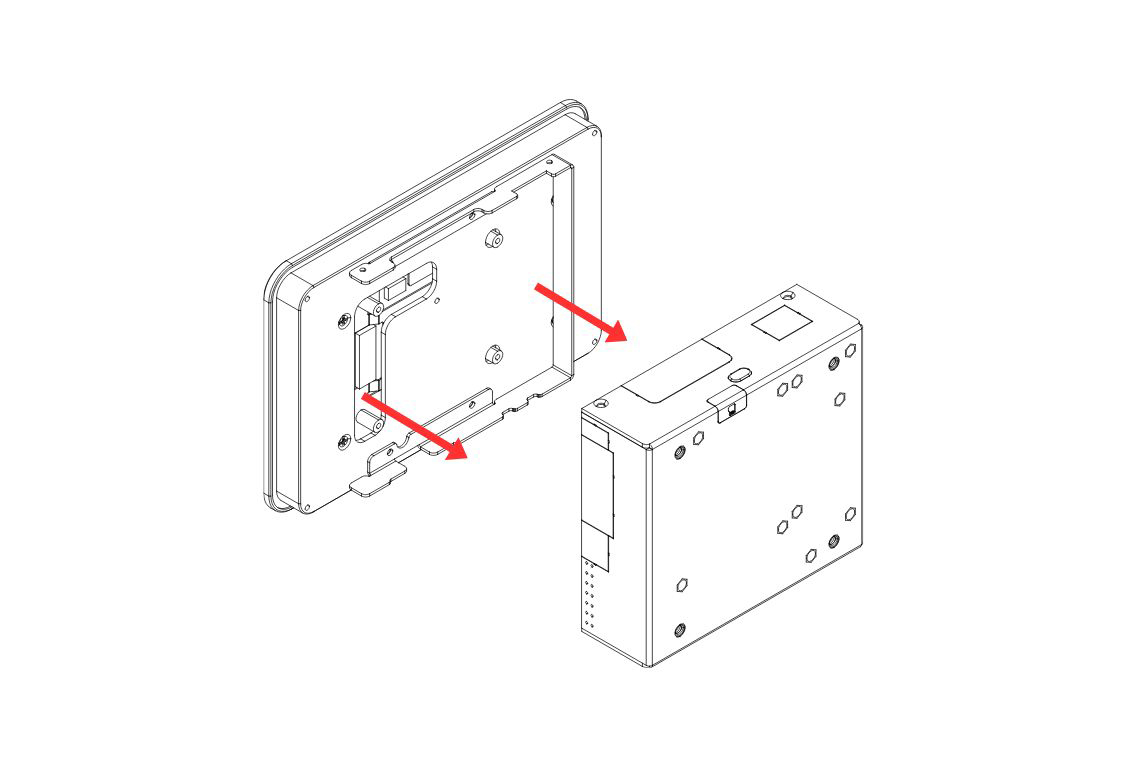
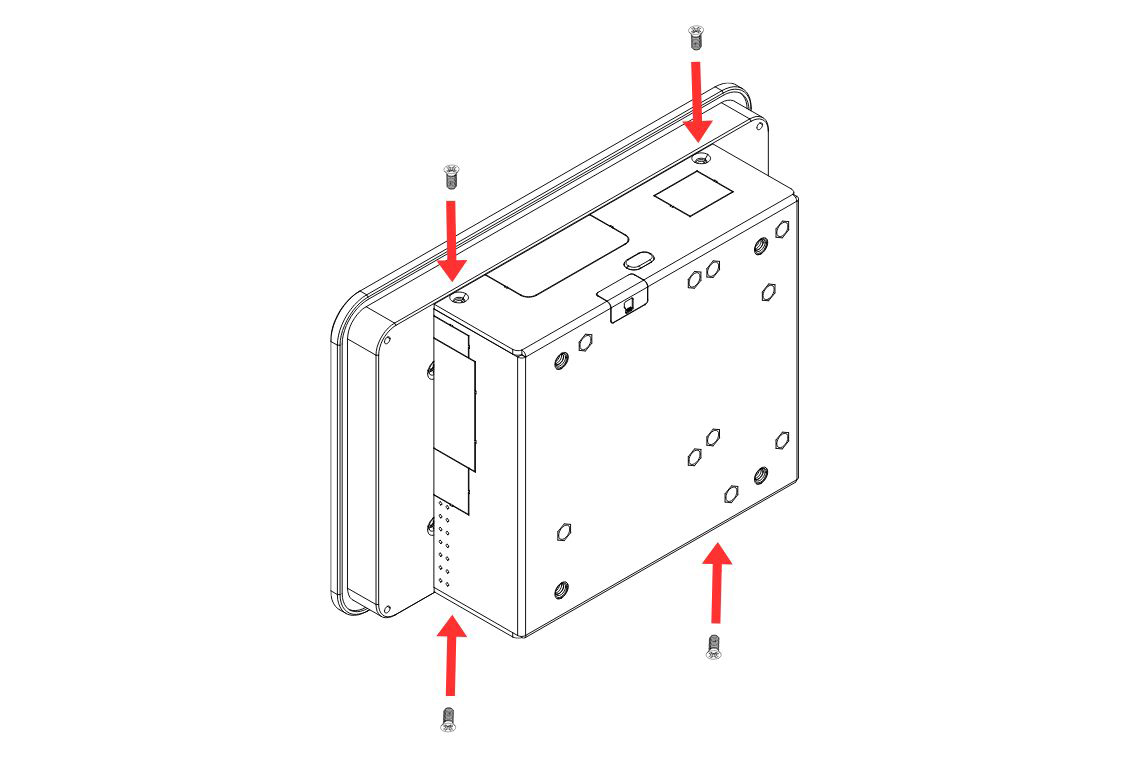
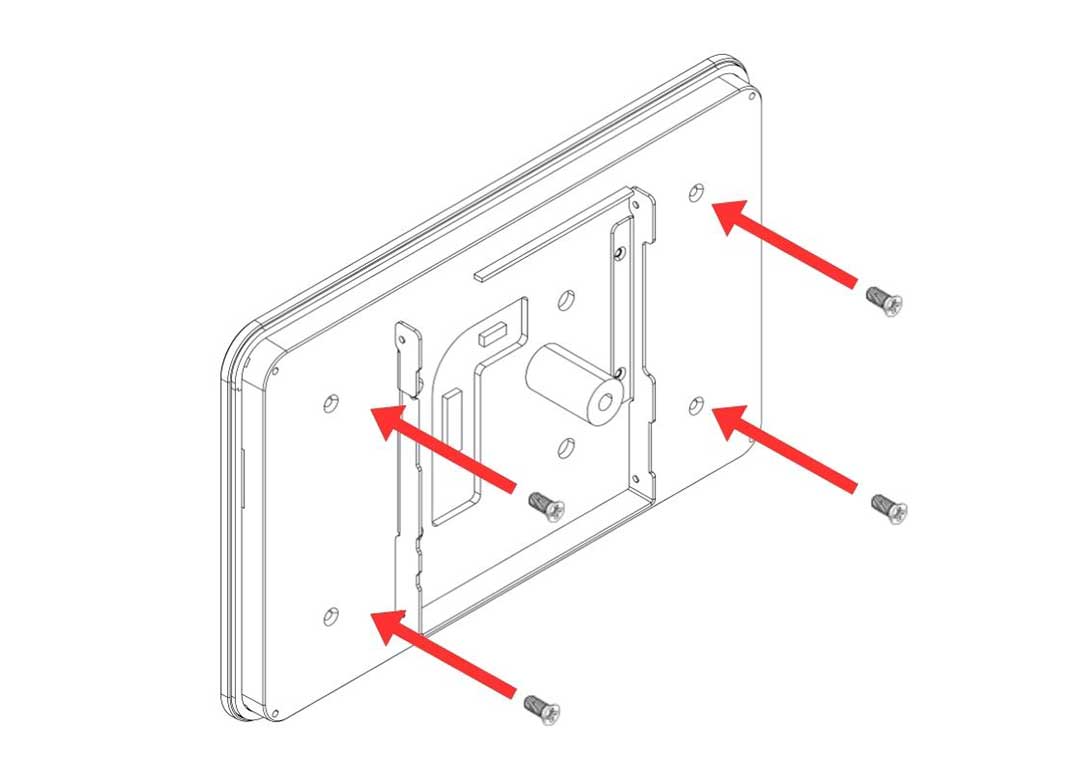
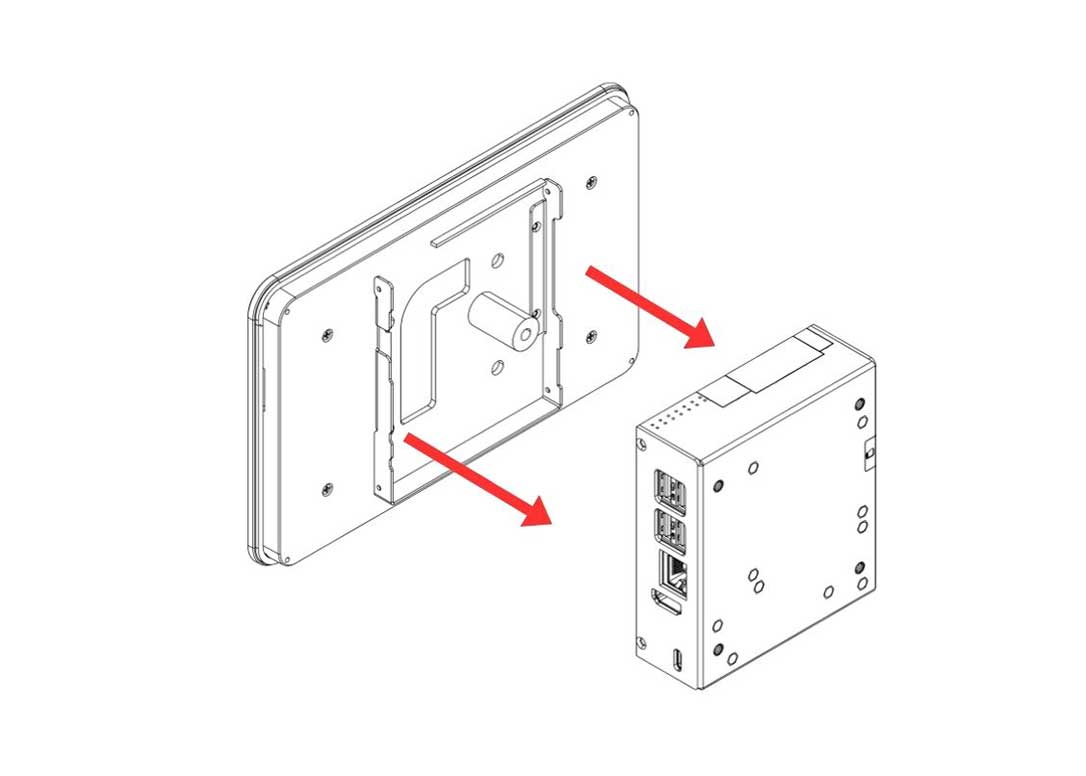
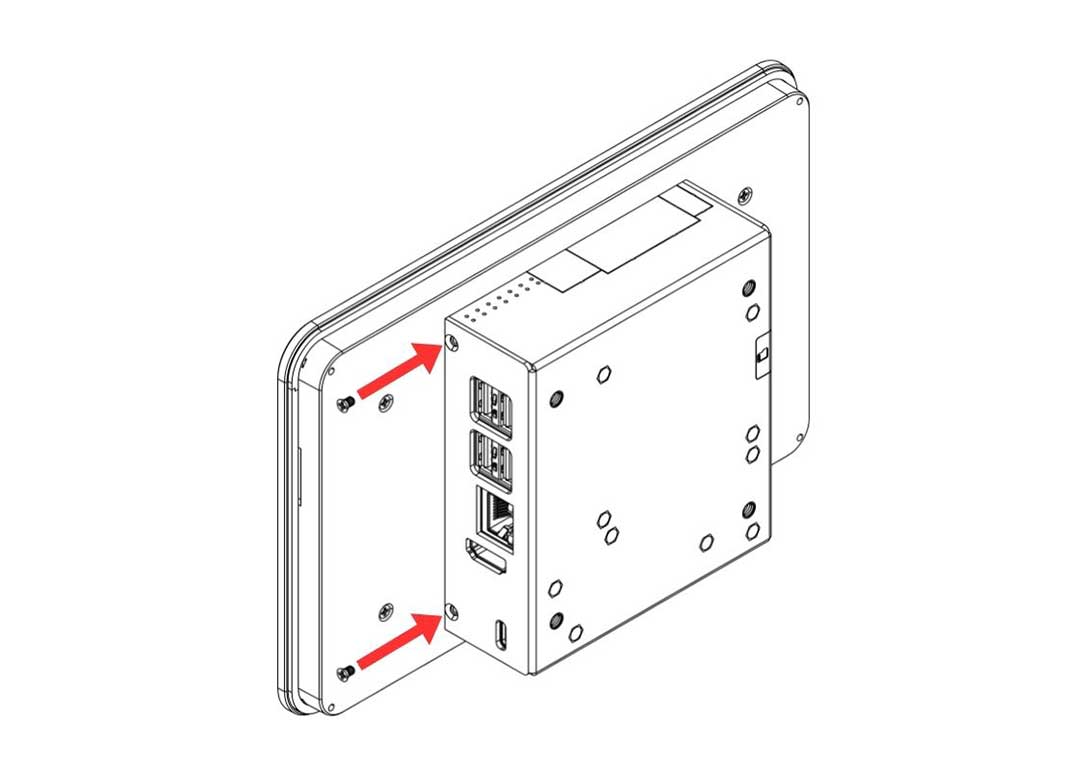
14. Carefully attach the HMI Display to the Body. Secure it using the SIlver Flat Head Screws.
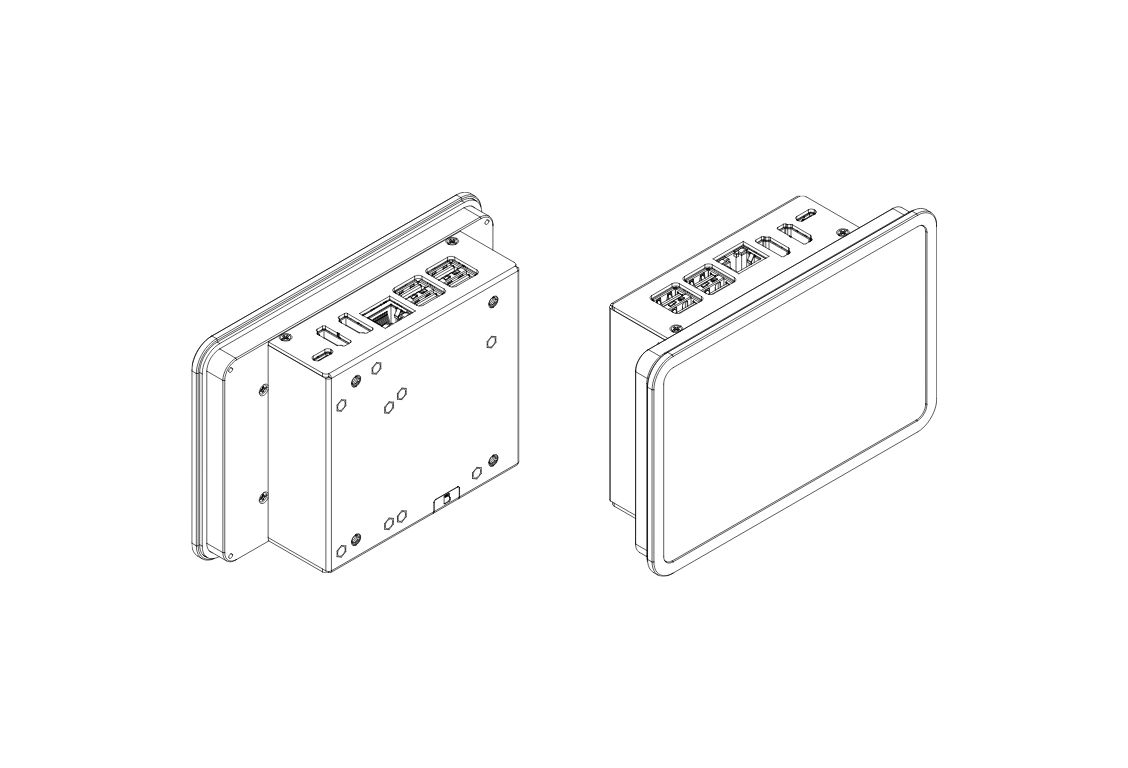
¶ 8" & 10" Parts and Features
¶ Argon Industrial HMI 8" 10"
¶ 8" & 10" Assembly & Setup
1. Apply the Silicon Thermal Pad on the Raspberry Pi 5. Make sure to REMOVE THE TRANSPARENT BACKING on both sides of the thermal pad.
2. Connect the Raspberry Pi 5 to Argon HMI-HDMI Board. PUSH ALL THE WAY IN the Argon HDMI Daughterboard, Make sure that the HDMI-Power Daughterboard is FULLY CONNECTED to the RPi 5 to AVOID POWERING UP ISSUES.
3. Carefully connect the PCIe Flat Flex Cable to the Raspberry Pi 5 PCIe Connector. Be careful when handling the brown PCIe flip/cover. Pull up the brown flip to release the lock. COPPER SIDE of the strip should be facing the white back side of the PCIe connector of the Raspberry Pi 5.
4. Carefully attach the Raspberry Pi 5 and the Argon HMI-HDMI Board into the Argon Industria HMI Case. Secure the boards using the flat head screws. Also secure the Argon HMI-HDMI Board using the Standoffs.
5. Carefully connect the HMI-HDMI Flat Flex Cable to the Argon HMI-HDMI Board. Be careful when handling the HDMI flip/cover. Pull the flip to release the lock. COPPER SIDE of the strip should be facing the white side of the connector of the Argon HMI-HDMI Board. Make sure that the no.2 end is connected.
6. Carefully attach the Argon HMI NVMe Board on top of the Argon HMI-HDMI Board. Please align the NVMe Board to the Standoffs and secure using the Flat Head Screws.

7. Connect the M.2 SSD to the Argon HMI NVMe Board and secure it using the NVMe Scew.
8. Carefully connect the PCIe Flat Flex Cable to the Argon NVMe Board. Be careful when handling the NVMe board connector flip/cover. Pull the flip to release the lock. COPPER SIDE of the strip should be facing the white side of the Argon NVMe Board connector.
9. Attach the Passive Cooling Column and the Display Case bracket to the Display Case and secure it using the Flat Head Screws.
10. Attach the Argon 7"/8" Touch Display to the Display Case and secure it using the Flat Head Screws.

11. Carefully connect the HMI-HDMI Flat Flex Cable to the Argon Touch Display. Be careful when handling the Display flip/cover. Pull the flip to release the lock. COPPER SIDE of the strip should be facing the white side of the Argon Touch Display connector. Make sure yo connect the no.1 side.
12. Carefully connect the 3 pin end of Power Supply Cable to the GPIO. Make sure it is connected to the 2x 5V power (2,4) and Ground (6).
13. Carefully connect the 2 pin end of the Power Supply Cable to the Argon Touch Display. Make sure it is connected properly.
14. Carefully attach the HMI Display to the Body. Secure it using the SIlver Flat Head Screws.
¶ Enabling Touch Screen
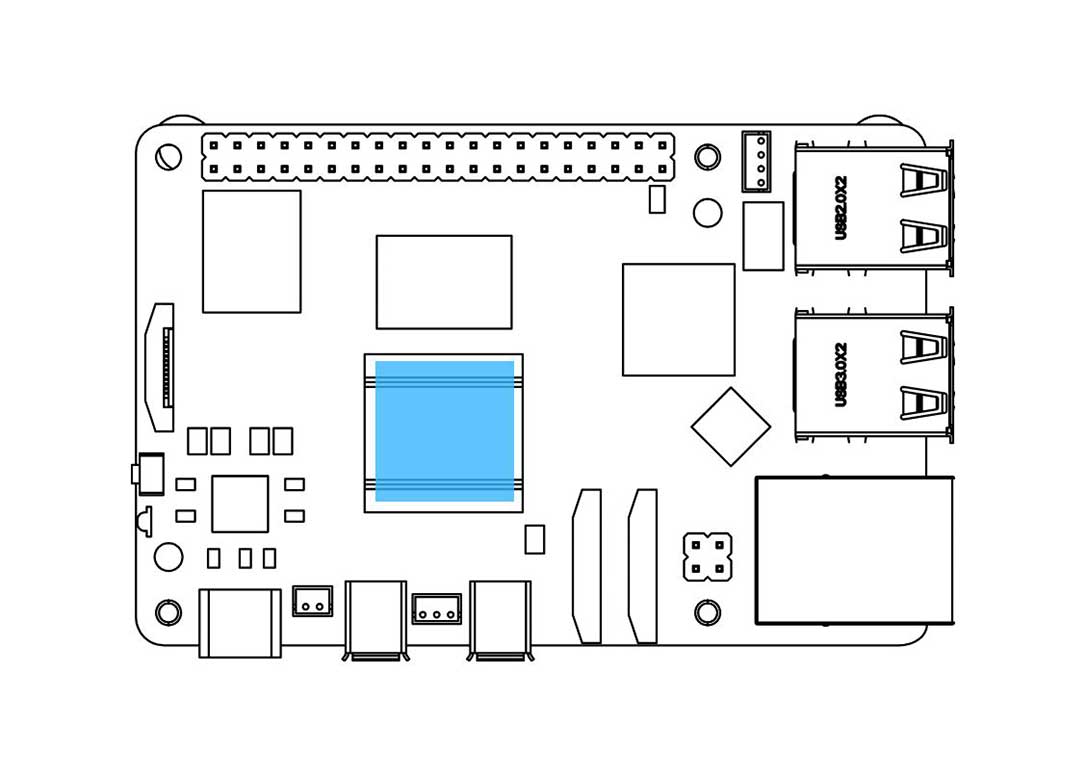
The touch screen of the Argon Industria HMI Displays is connected via the USB OTG Function of the POWER USB-C of the Raspberry Pi 5. Thus, you will need to enable the OTG function of the Raspberry Pi 5 by following the steps below:
1. Modify the config.txt File using the Command Terminal.
You will need with superuser privileges
sudo nano /boot/firmware/config.txt
Add the following settings at the bottom of the file under [All]
dtoverlay=dwc2,dr_mode=host
dtparam=pciex1_gen=3
The first line enables the USB OTG function, while the second setting enables the PCIe Gen 3 functionality of the Raspberry Pi 5.